E350 Electric Trike (Gen 1) TroubleshootingUpdated 4 months ago
The Troubleshooting tips detailed below are only applicable for the following E-Trike(s)
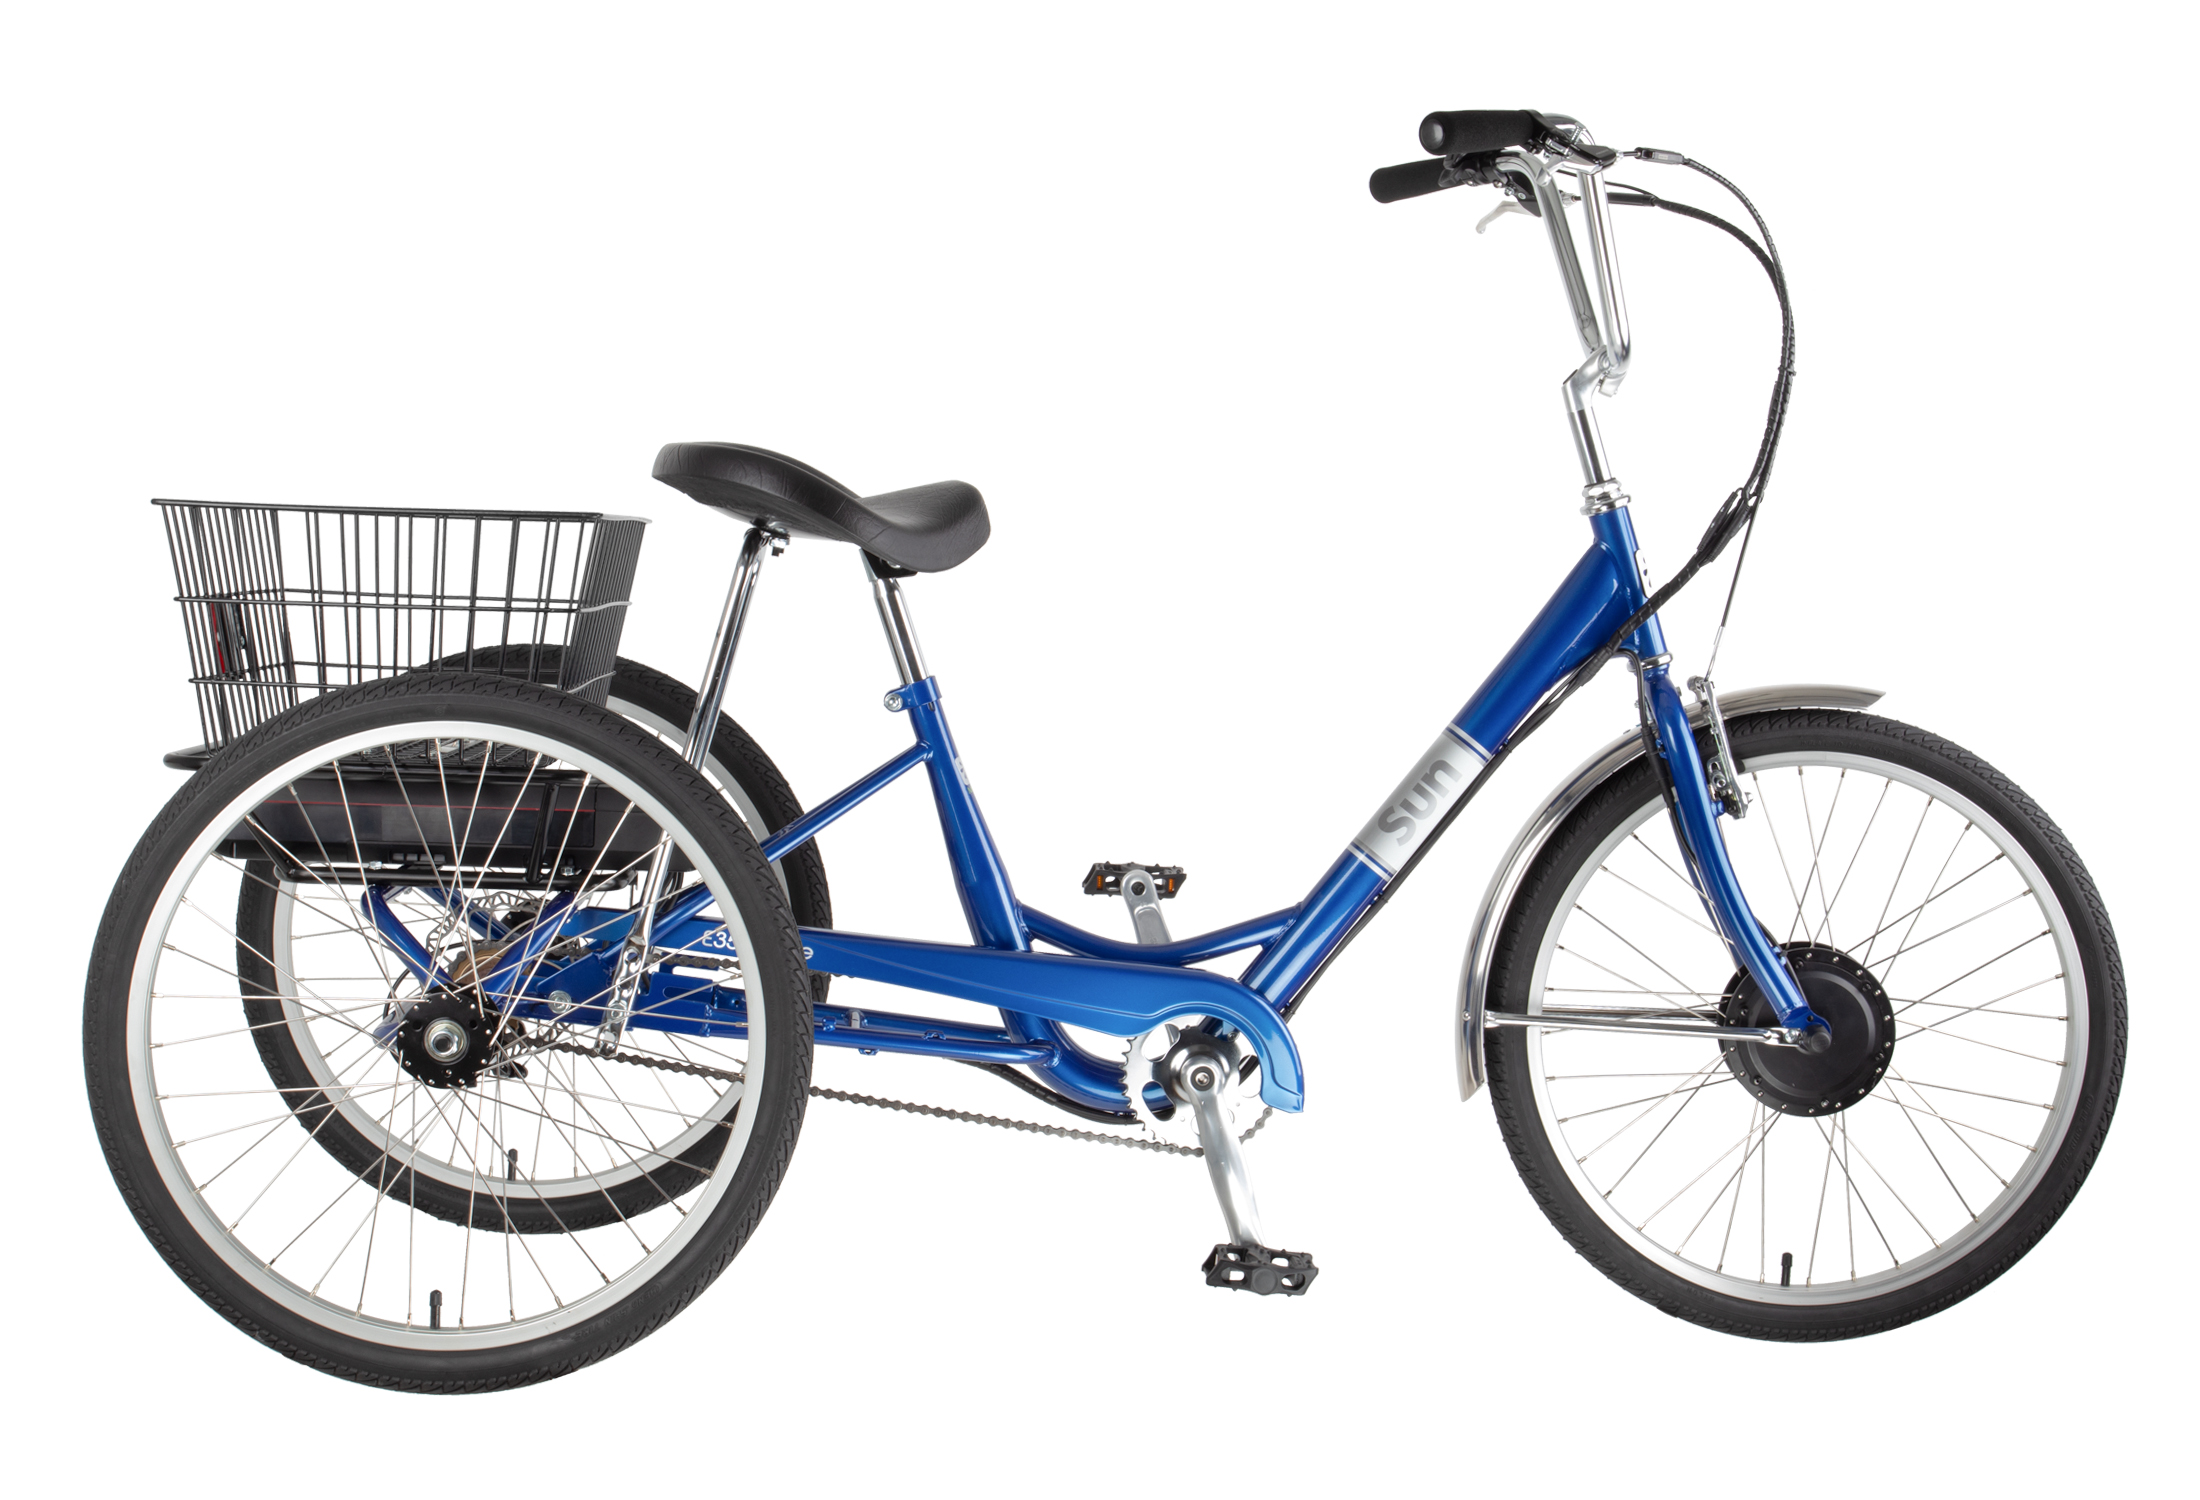
- Brand: Sun Bicycles
- Model: E350 Electric Trike (Gen 1)
- P/N: 670830 - JBI Link
- Release Date: January 2020
- Discontinue Date: June 2024
BEFORE YOU GET STARTED
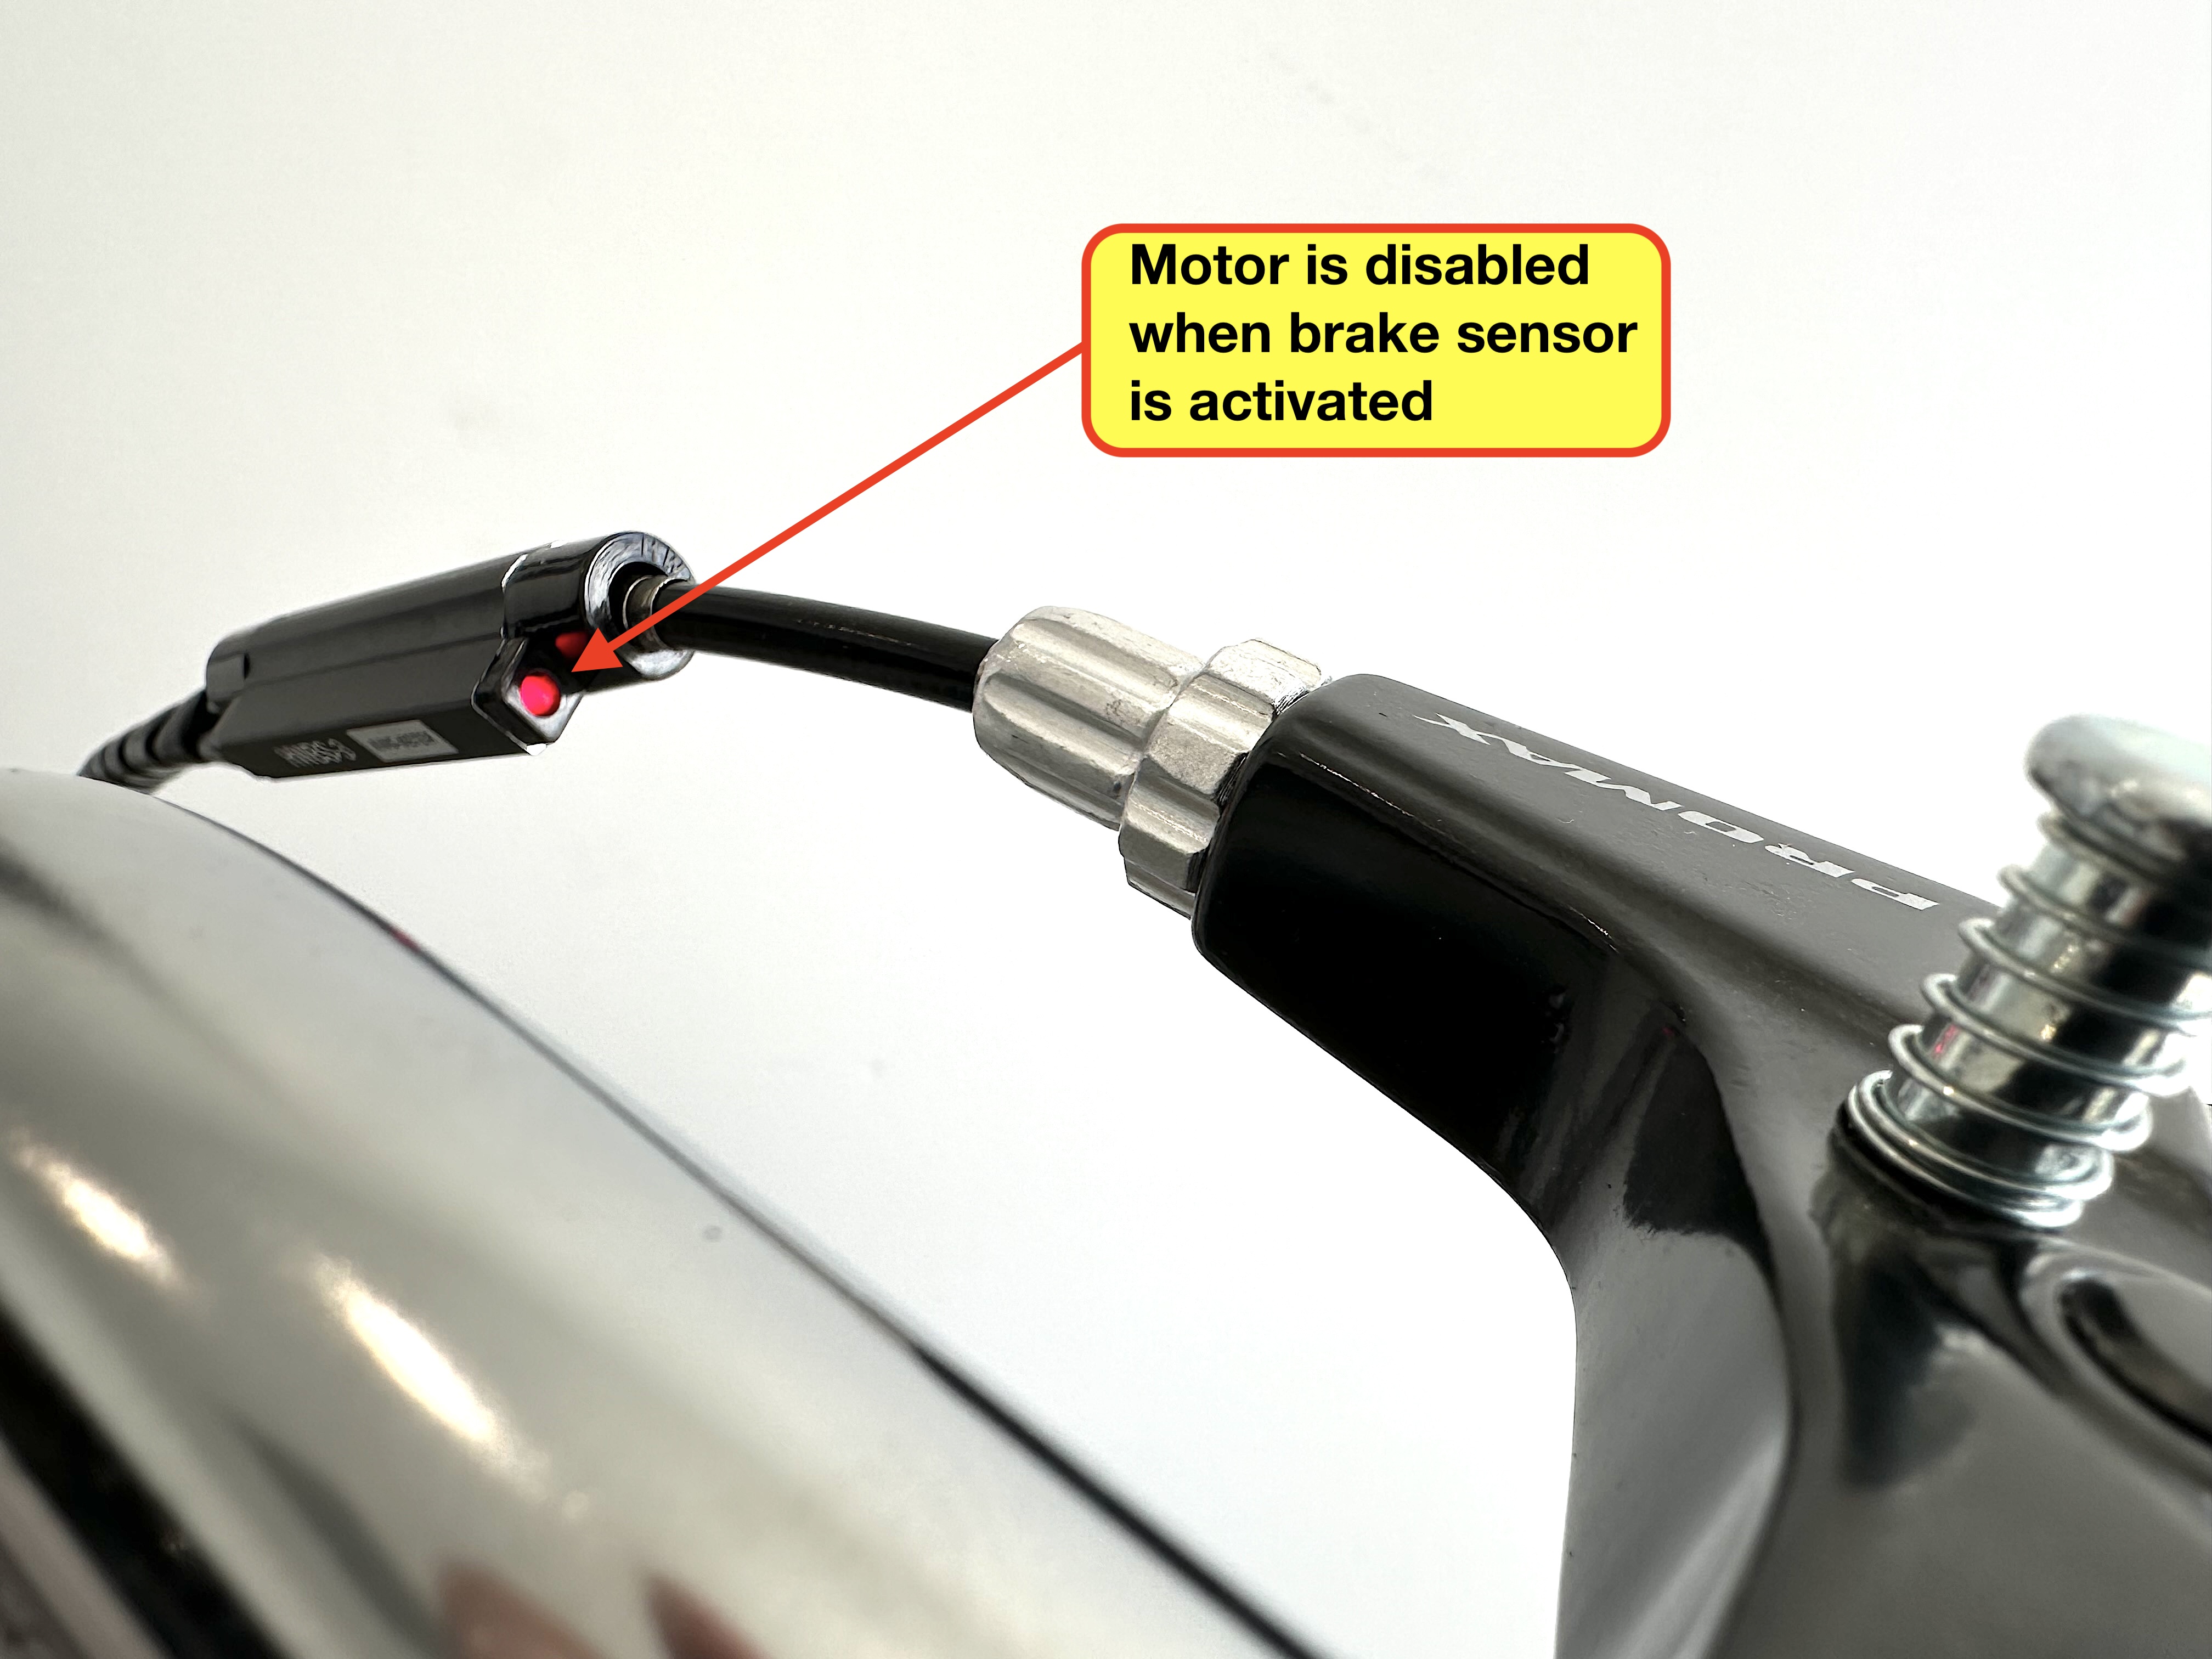
The steps detailed below require disconnecting and reconnecting cables from the display, throttle, brake sensors, BB sensor, motor, primary wire harness, and controller
- Disconnecting Cables
- These cables fit snugly; apply a gentle but firm force to disconnect them
- Important: Always grasp the plug, not the wires, to avoid damaging the cables
- Reconnecting Cables
- Cables are designed to connect in only one specific way
- Align the arrow on the male plug with the arrow on the female plug for a correct connection
- Note: The alignment arrows can be hard to see. Inspect each connection closely before proceeding
This approach ensures that the cables are handled safely and connected correctly
1. MAKE SURE POWER IS ON
- Make sure the unit can power on and off normally
- Step 1 - Power on the battery
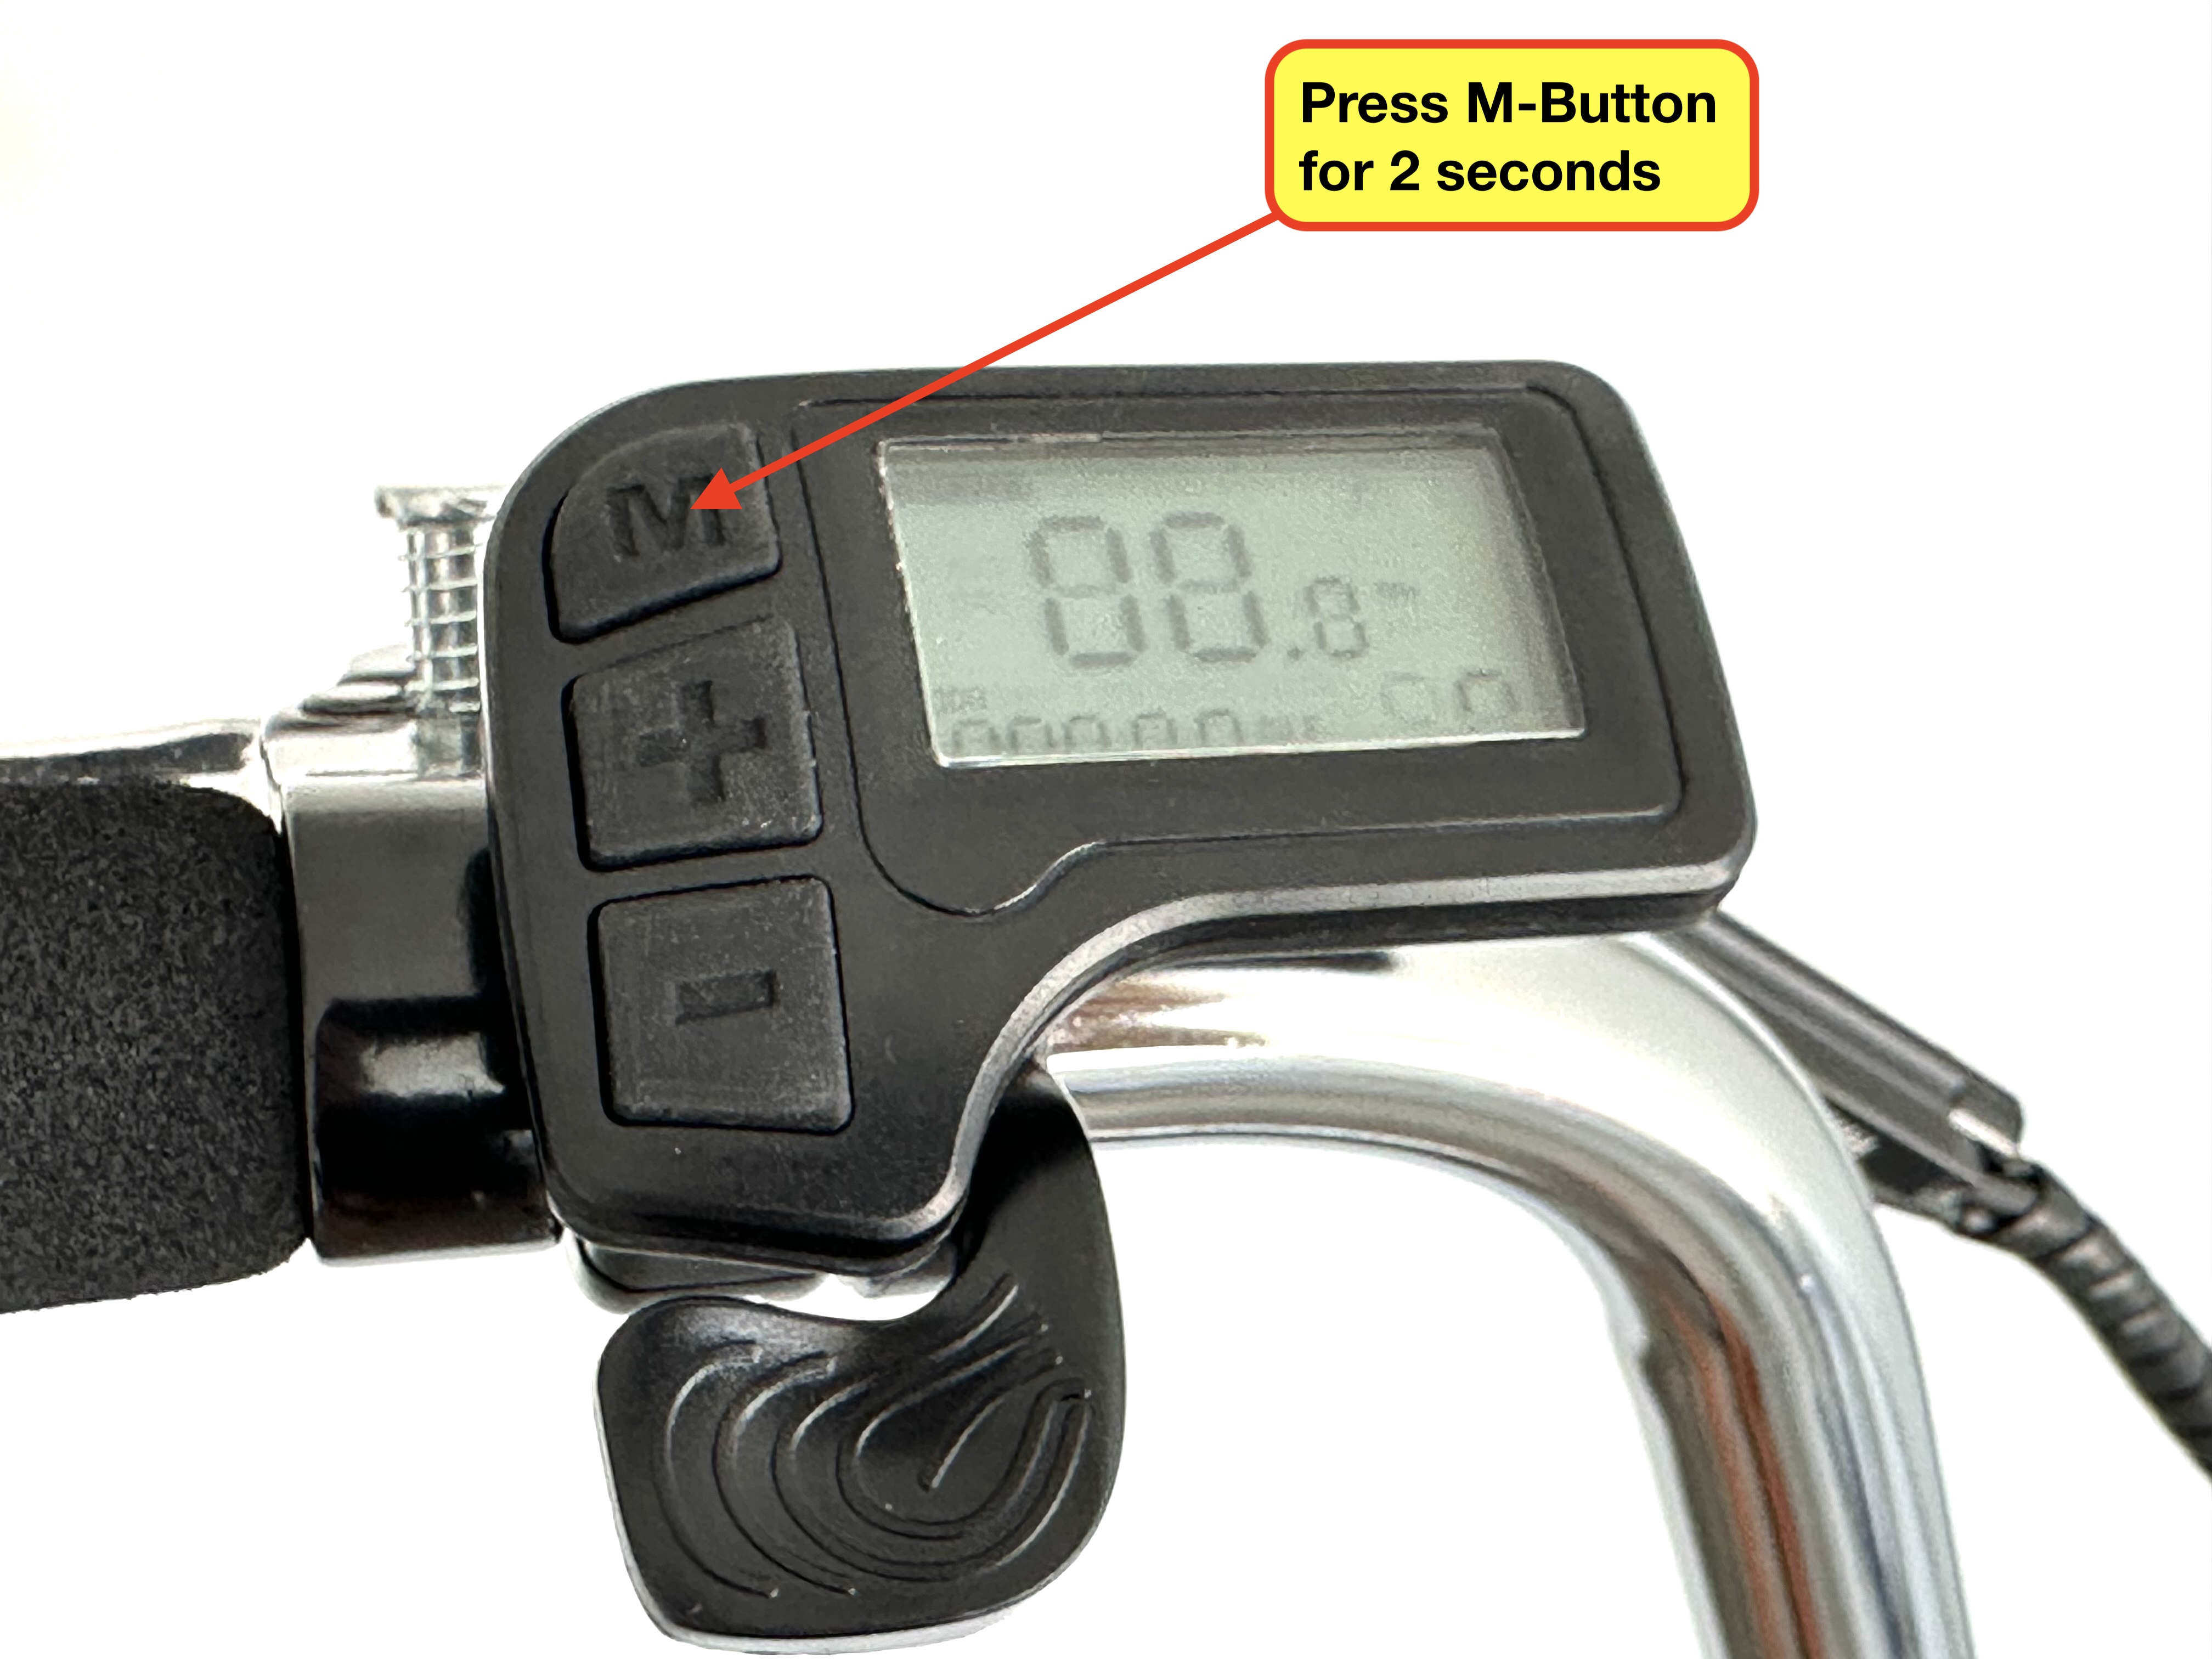
- Step 2 - Power on the display
- If the display is on, then the trike has power
- Note: The display will power on even if the hub motor is unplugged
2. TROUBLESHOOT POWER
- Remove and then reinstall the battery, ensuring it is fully installed and locked into the battery tray
- Confirm the battery is sufficiently charged and powers on normally
- If the battery is dead, recharge with the supplied charger
- Plug the charger into a compatible and functional wall outlet; the LED on the charger should glow solid green
- Plug the charger into the battery; the LED should change from solid green to solid red, signaling that the battery is charging
- Refer to the Charging Indicator on the side of the battery to check the charging status
- Solid green LEDs indicate the current charge level
- Flashing green LEDs indicate the battery is still charging and capacity remains to be filled
- Example: One solid green LED followed by three flashing green LEDs signifies that the battery is 25% charged and continues to charge the remaining capacity
- If the battery is dead, recharge with the supplied charger
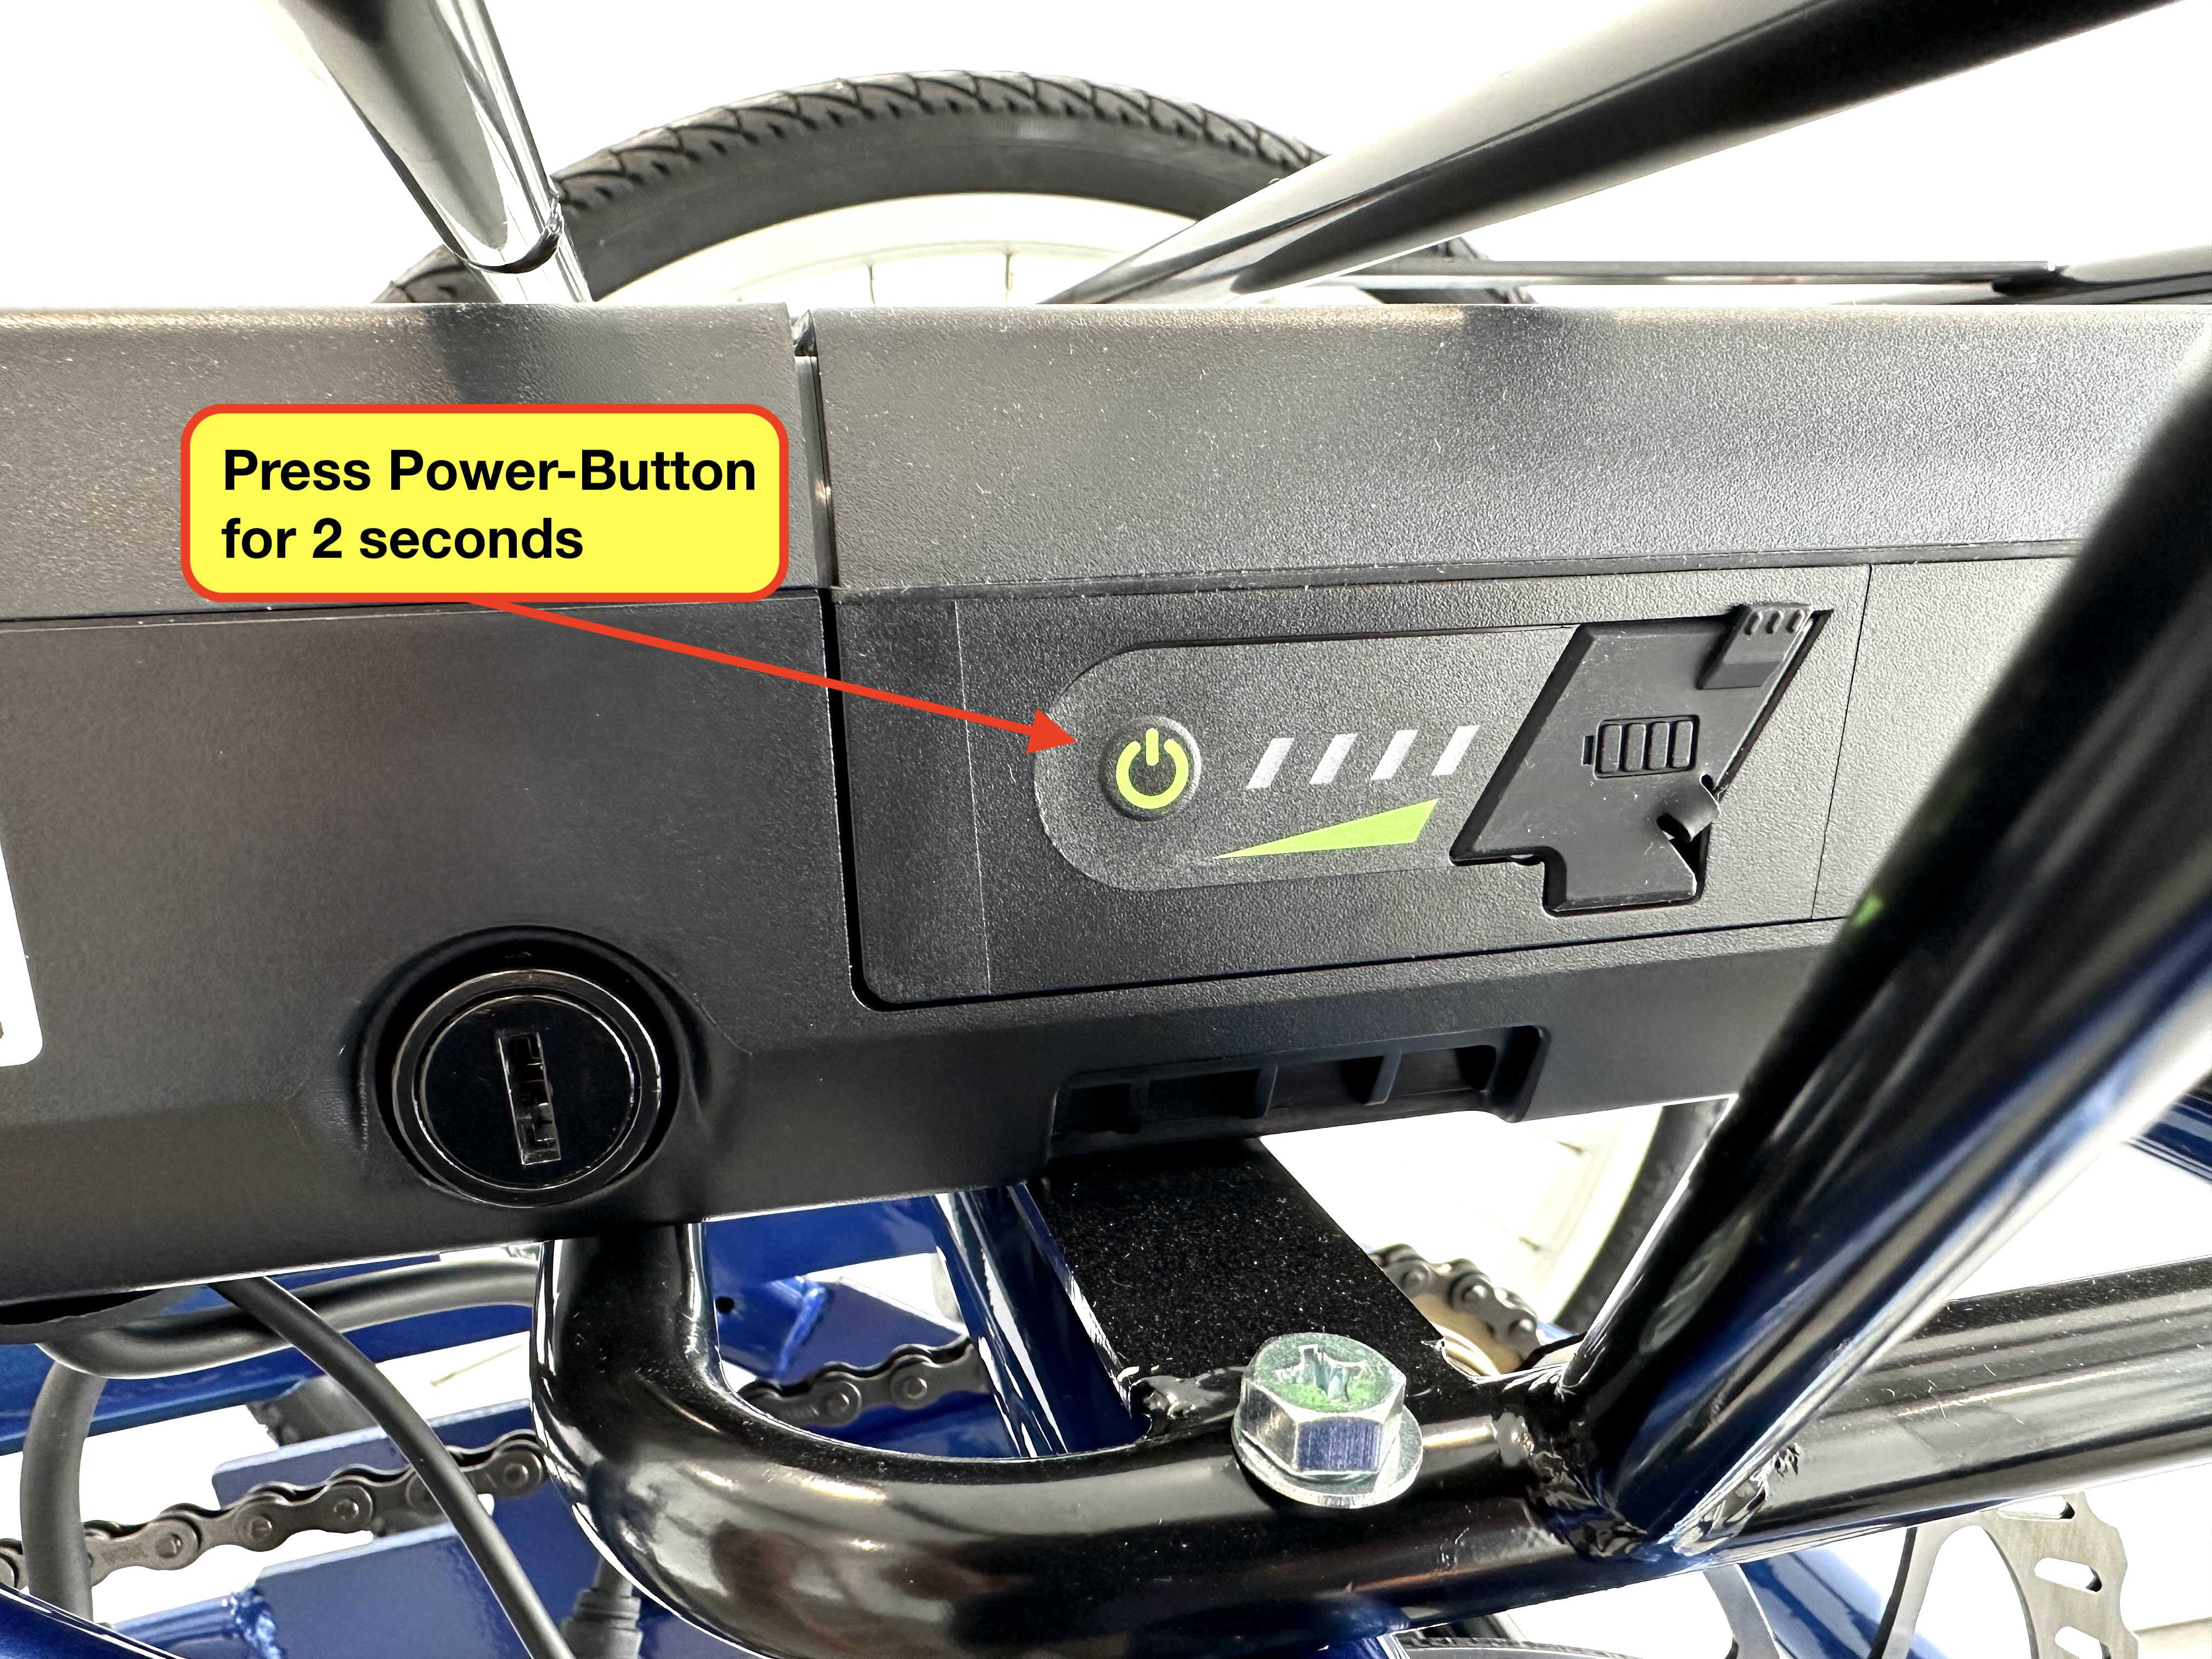
- Power-OFF the battery by depressing the power button on the side of the battery for approximately 2 seconds
- Normal Power OFF - The LED will illuminate all 4 bars at the same time, and then each bar will turn off one at a time from right to left
- Power-ON the battery by depressing the power button on the side of the battery for approximately 2 seconds
- Normal Power ON - The LED will illuminate one at a time, from left to right, until all 4 bars are green, and then it will adjust to display the current state of charge
- When an error occurs in the battery, the battery level indicator will blink certain LEDs. Refer to pages 39-40 in the E350 Supplement for more details
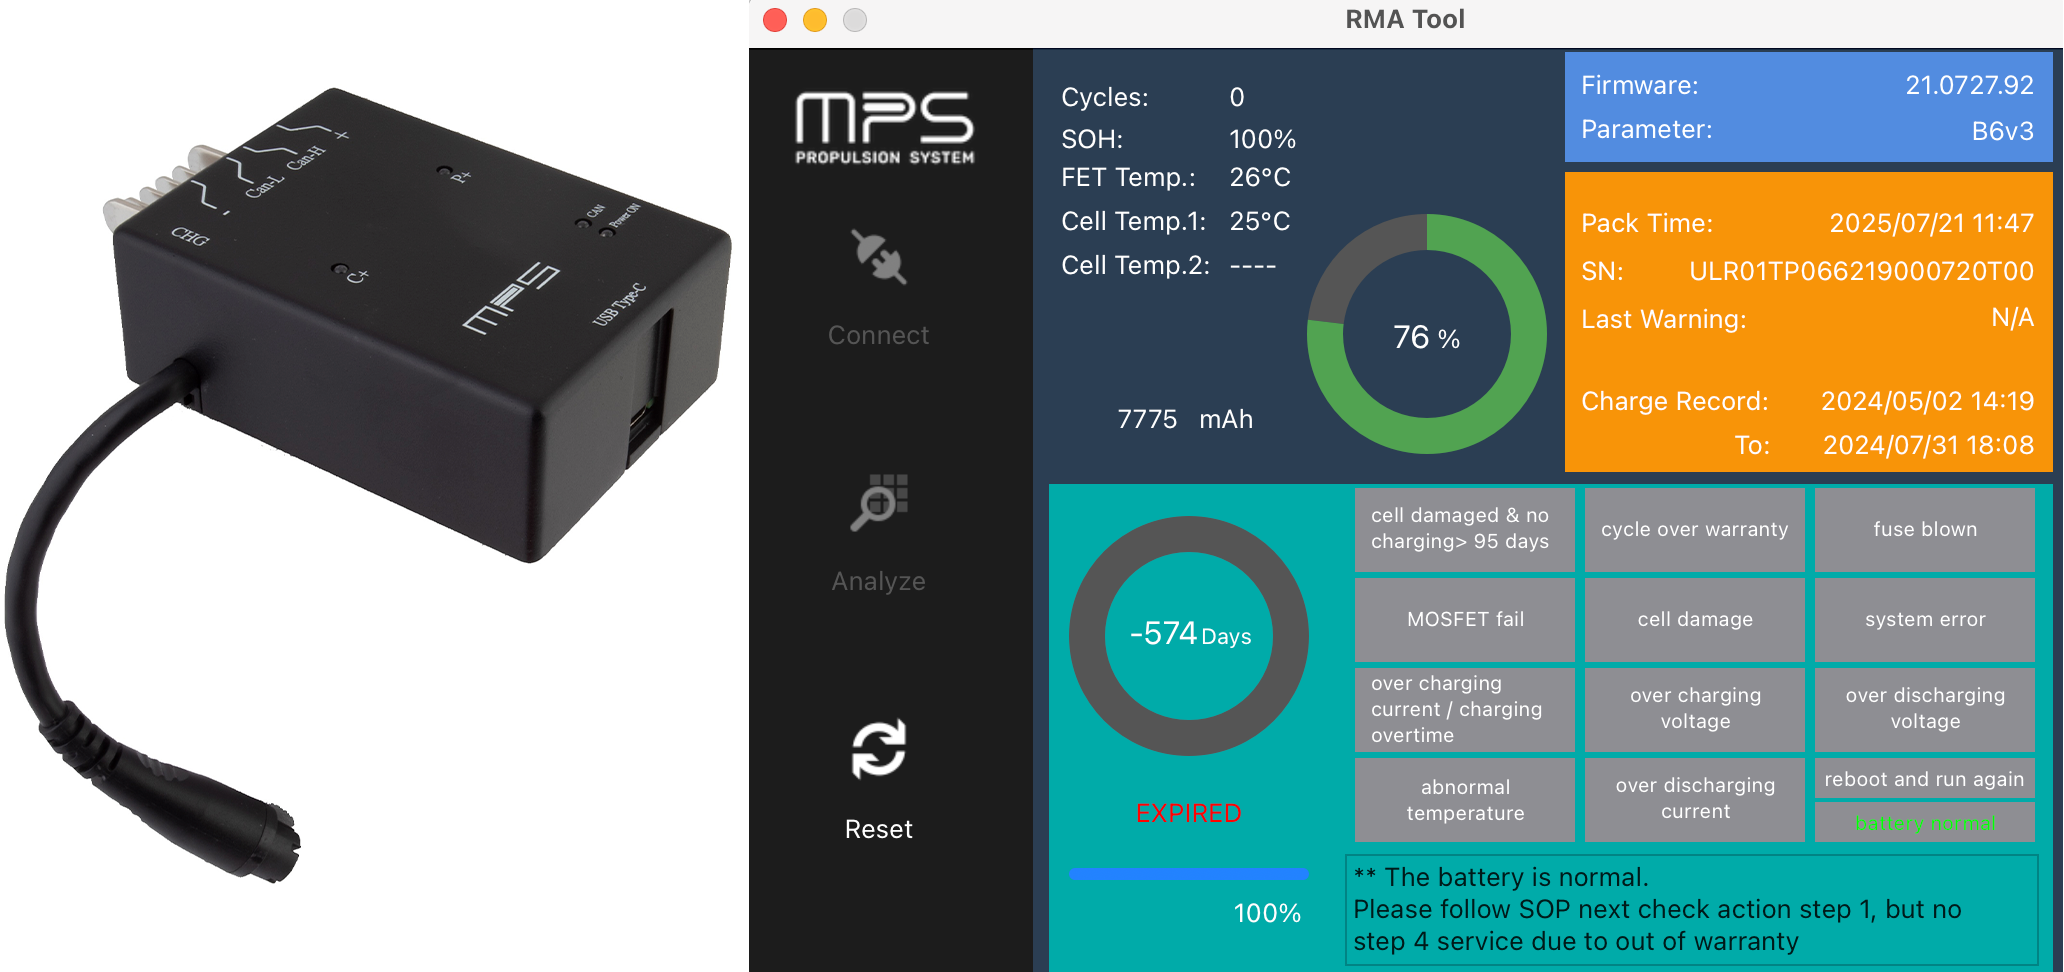
2.1. ADVANCED BATTERY DIAGNOSTICS
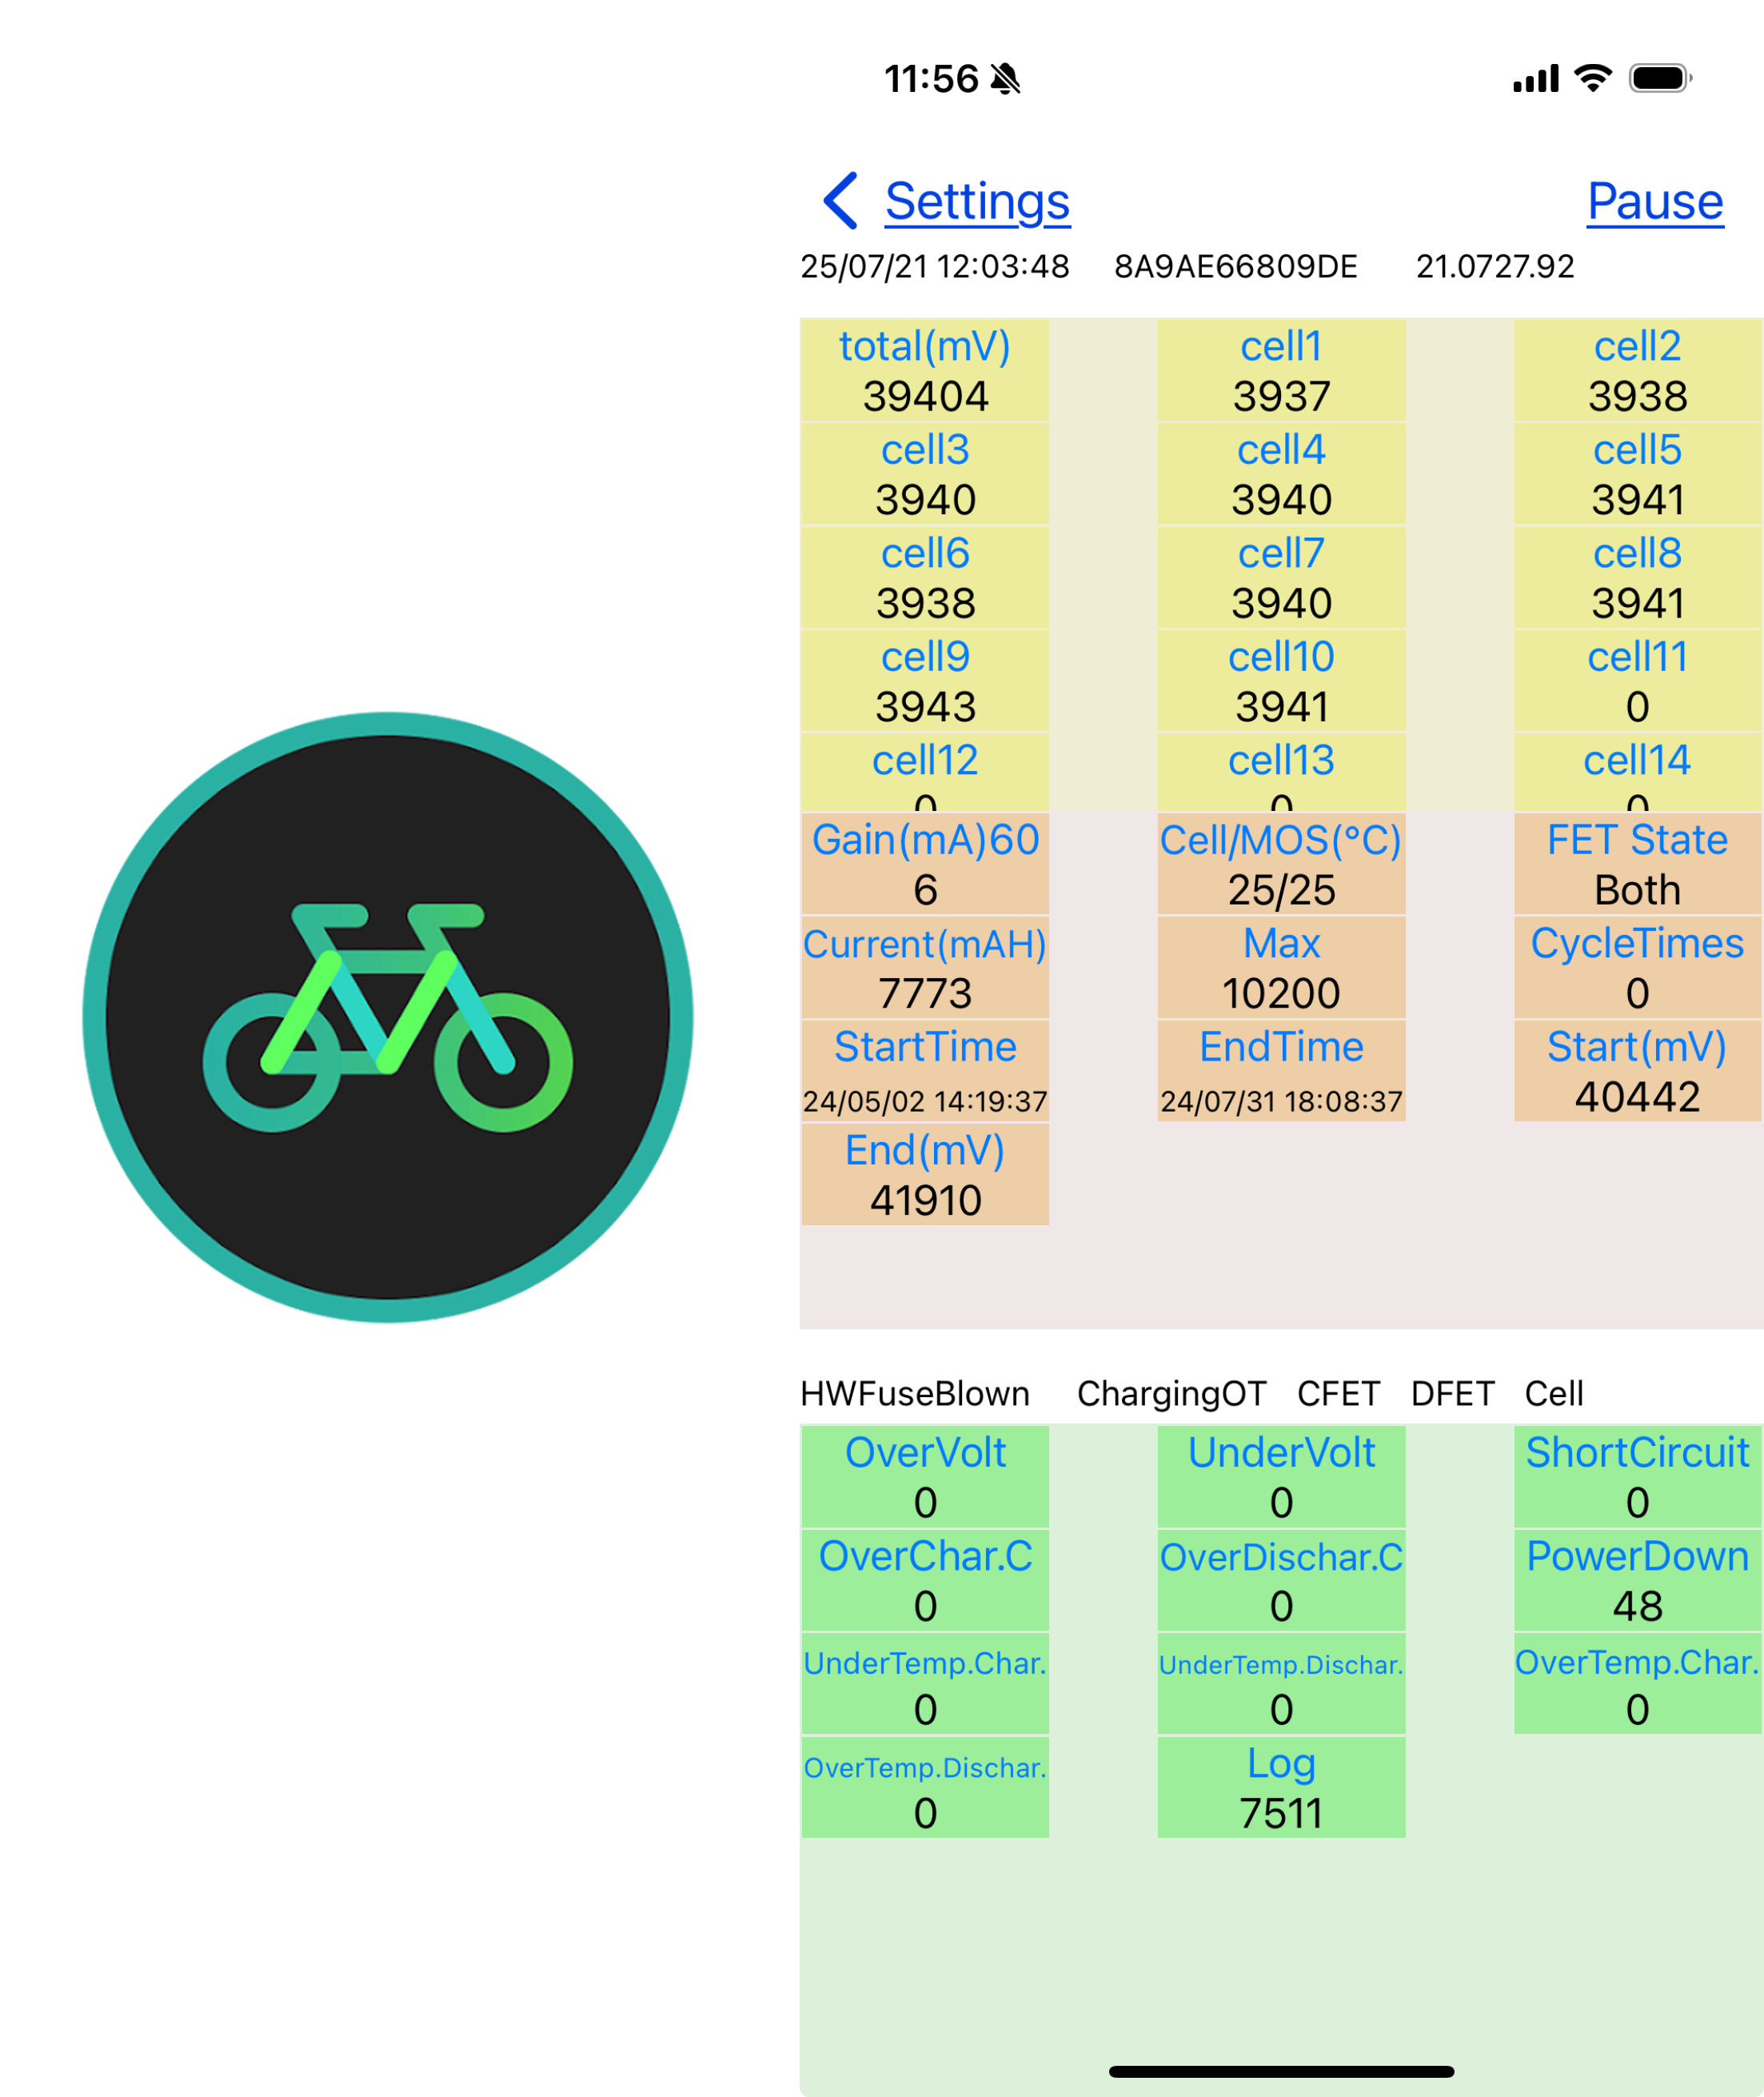
If the trike isn’t powering on and you suspect a battery issue, you can try connecting the battery via Bluetooth using the MPS mBike app or use the MPS RMA analyzer dongle for a more detailed analysis of its condition.
- mBike Mobile App – Connect the battery via Bluetooth to access its diagnostic mode. Click here for complete details
- Helpful Tip: If you’re unable to connect to the app, try plugging the charger into the battery first. In some cases, this initiates power flow through the battery, enabling a Bluetooth connection.
- MPS RMA Analyzer dongle – Connect battery directly to a PC or MAC using the RMA Analyzer dongle, JBI Part No. 670877
- MPS / RMA Analyzer Software – PC – Download Link
- MPS / RMA Analyzer Software – MAC – Download Link
- MPS / RMA Analyzer Diagnostic Guide – Link
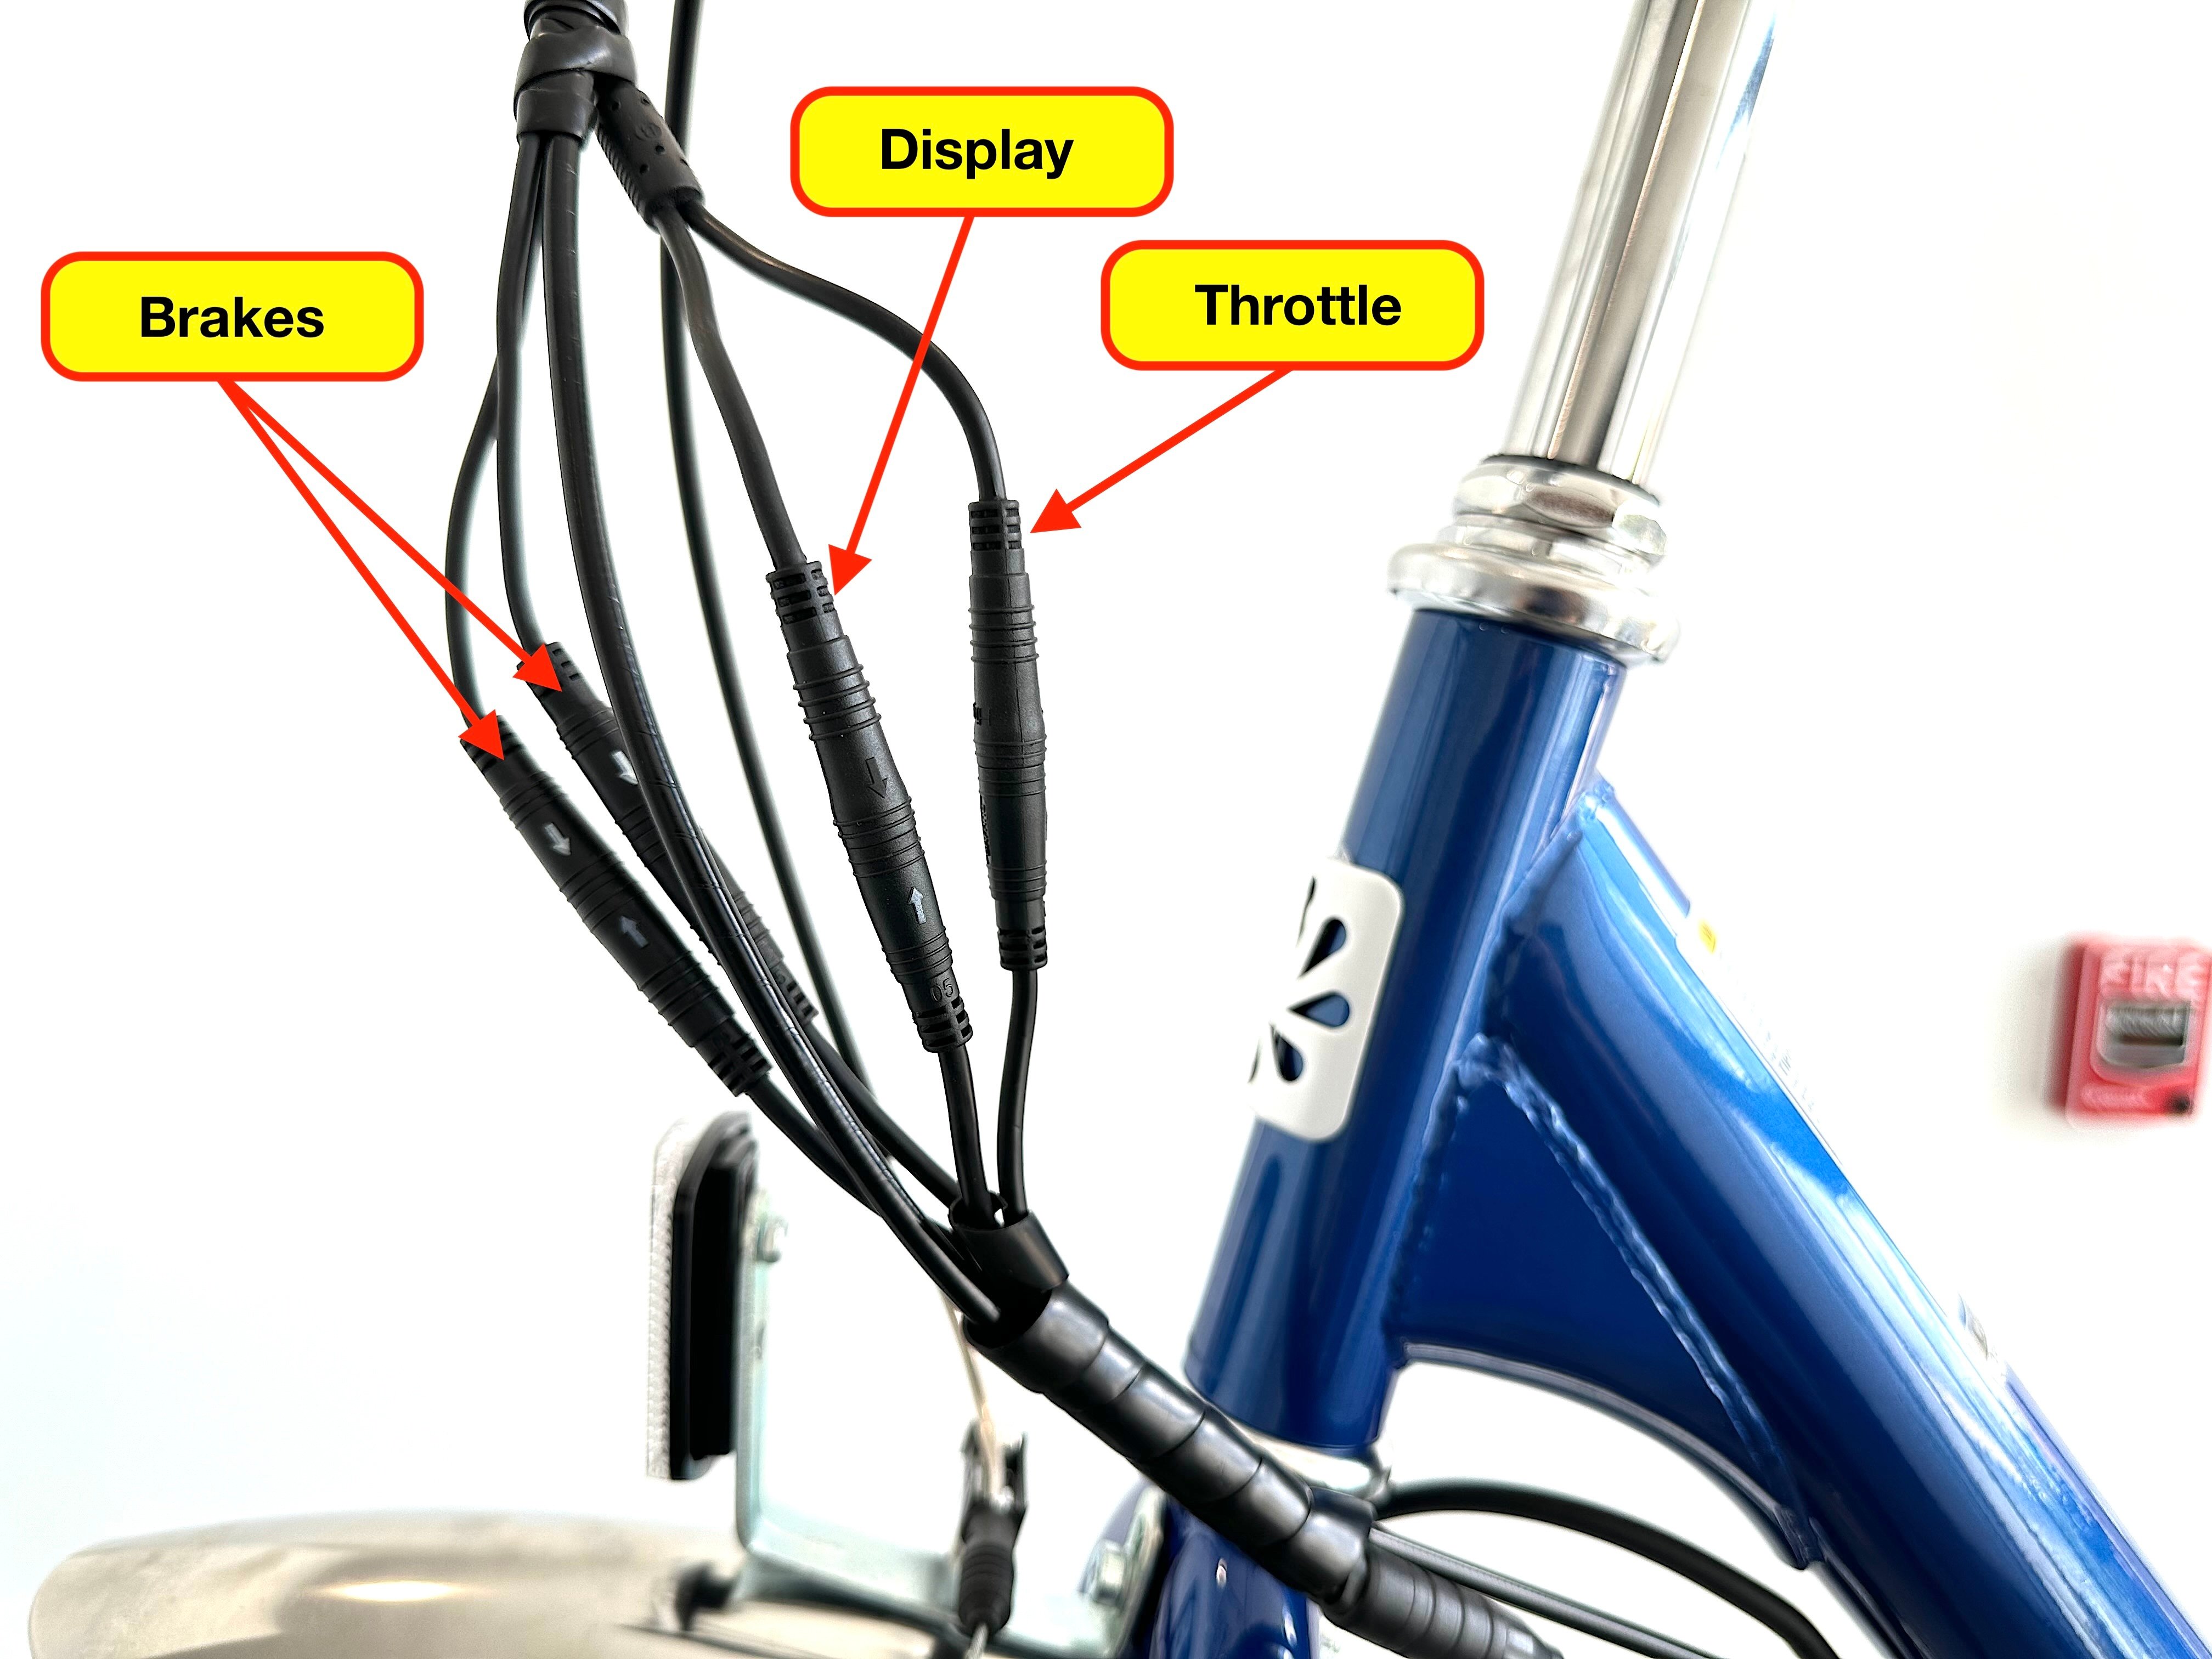
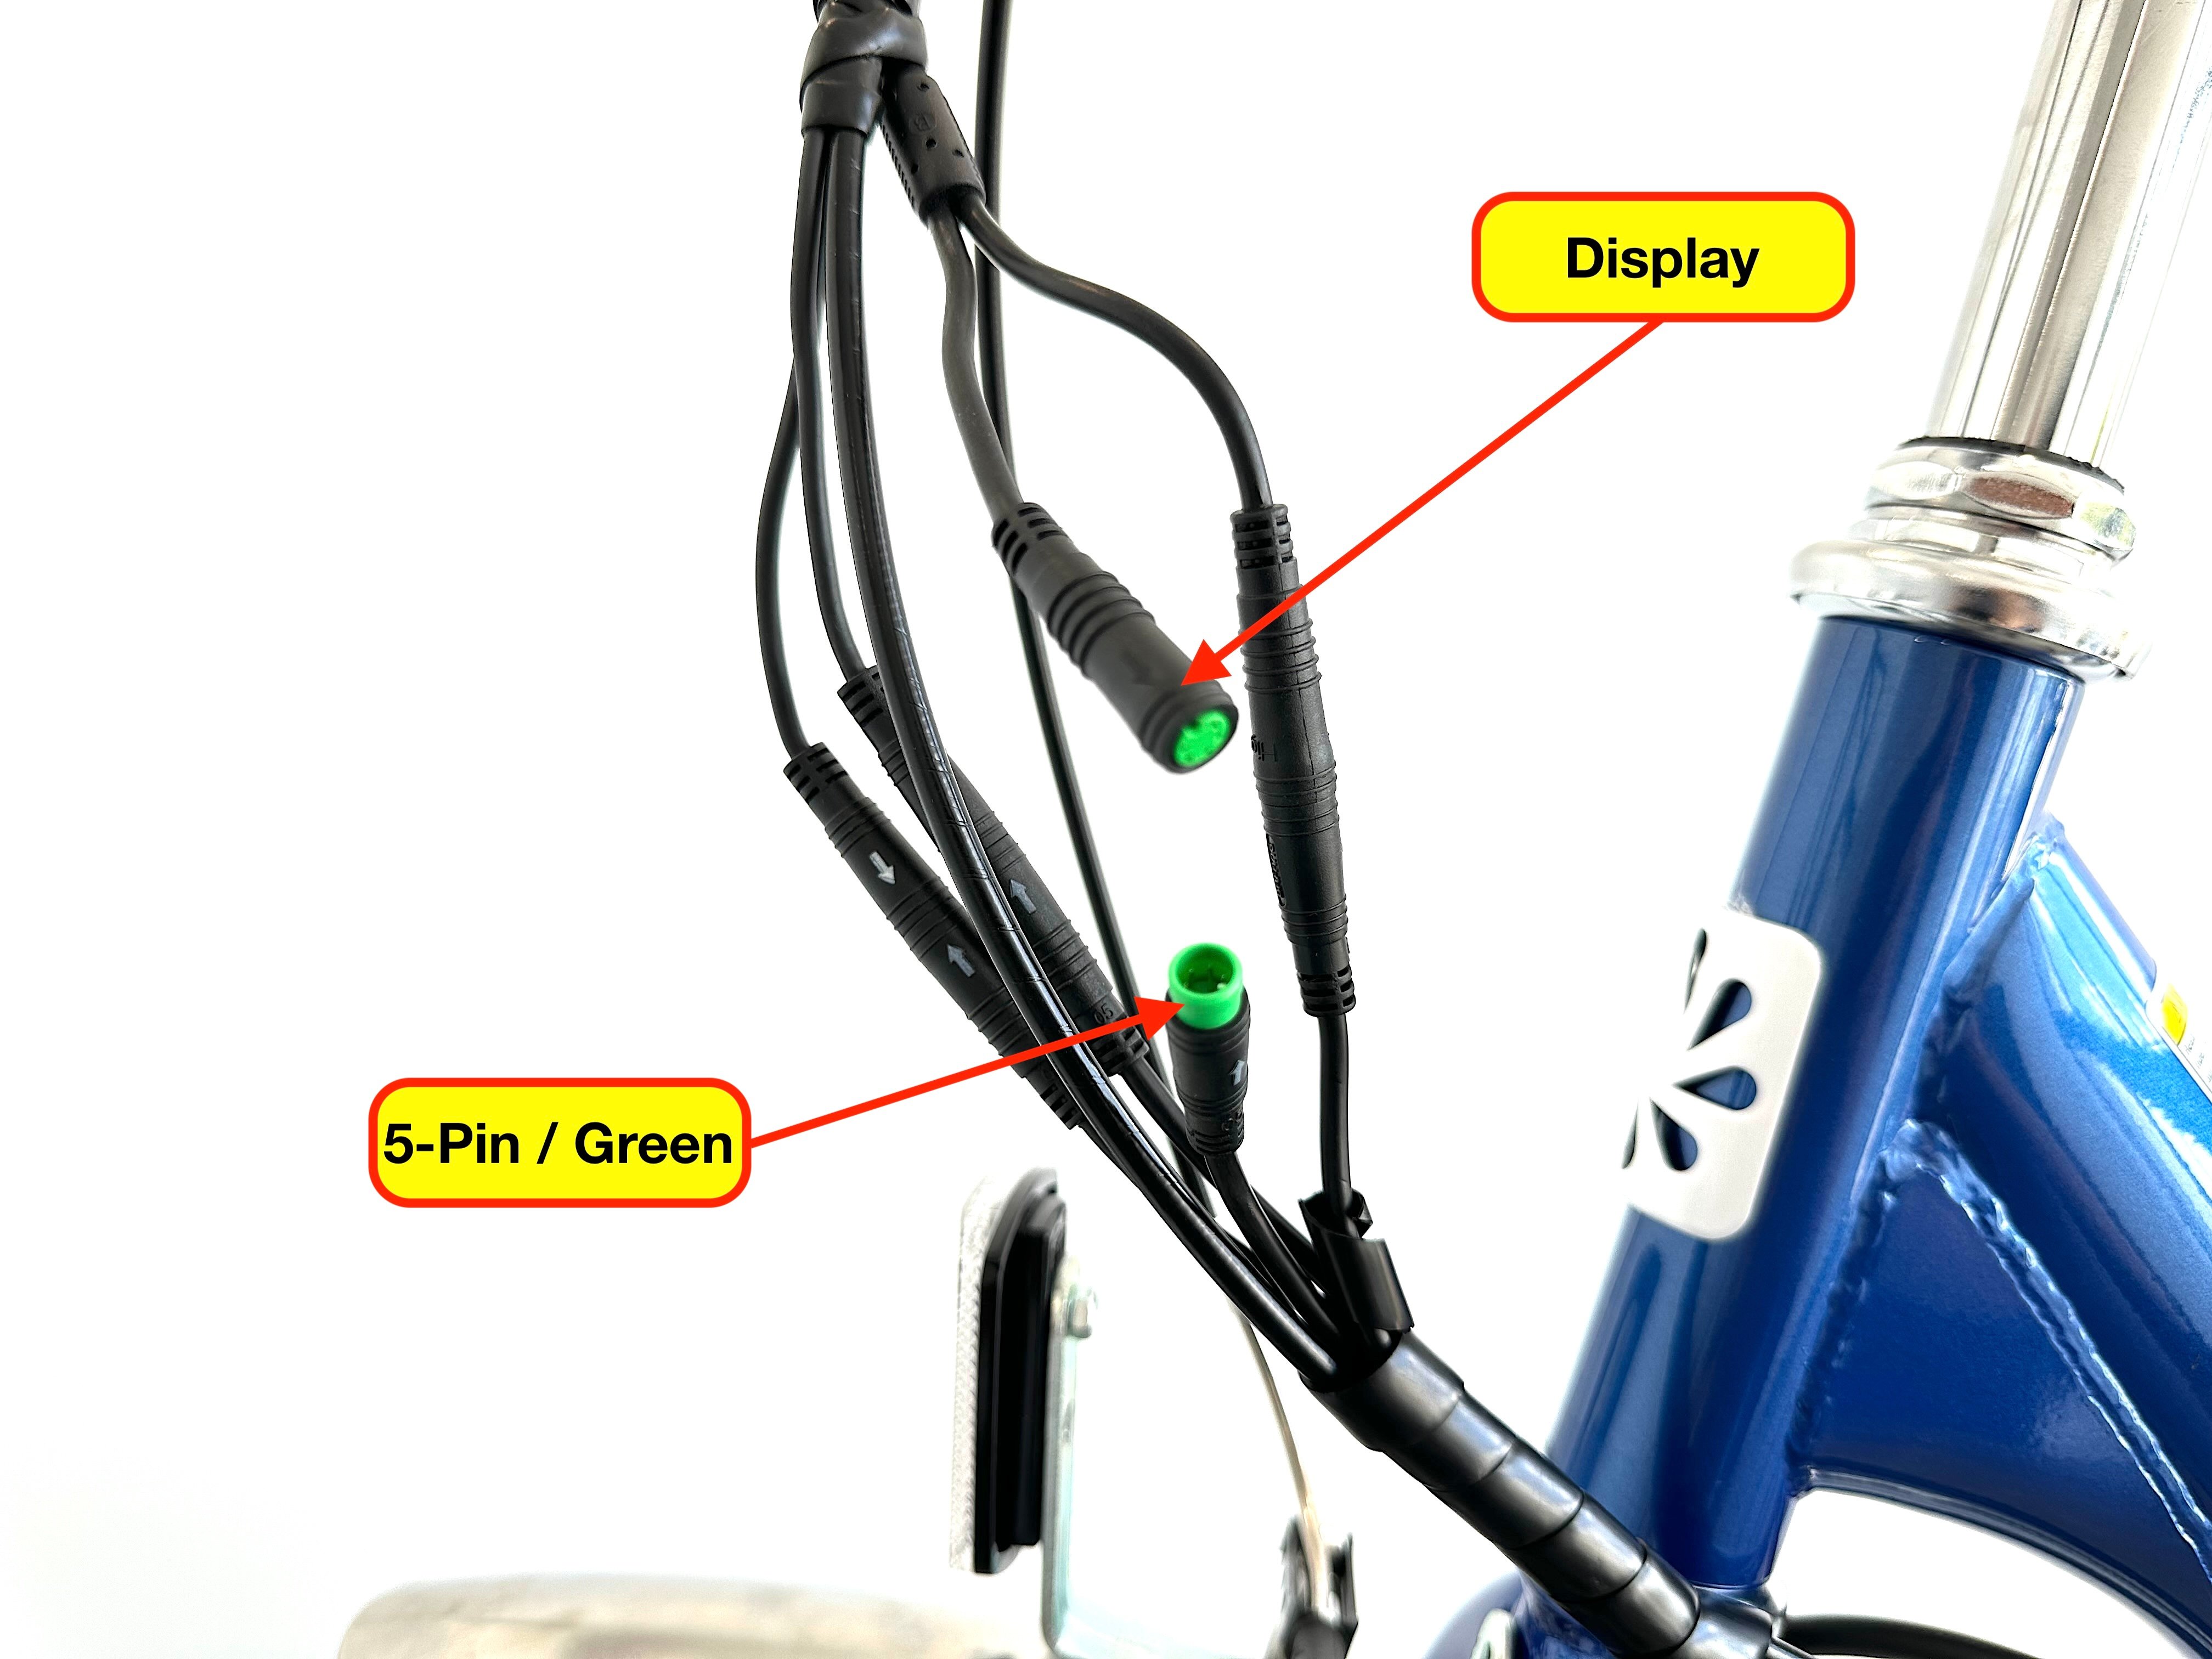
3. CHECK THE DISPLAY
- If the display is not functional, unplug the quick-connect for the display (located near the display) and inspect the wire and connection pins for signs of damage. If all looks good, then reconnect
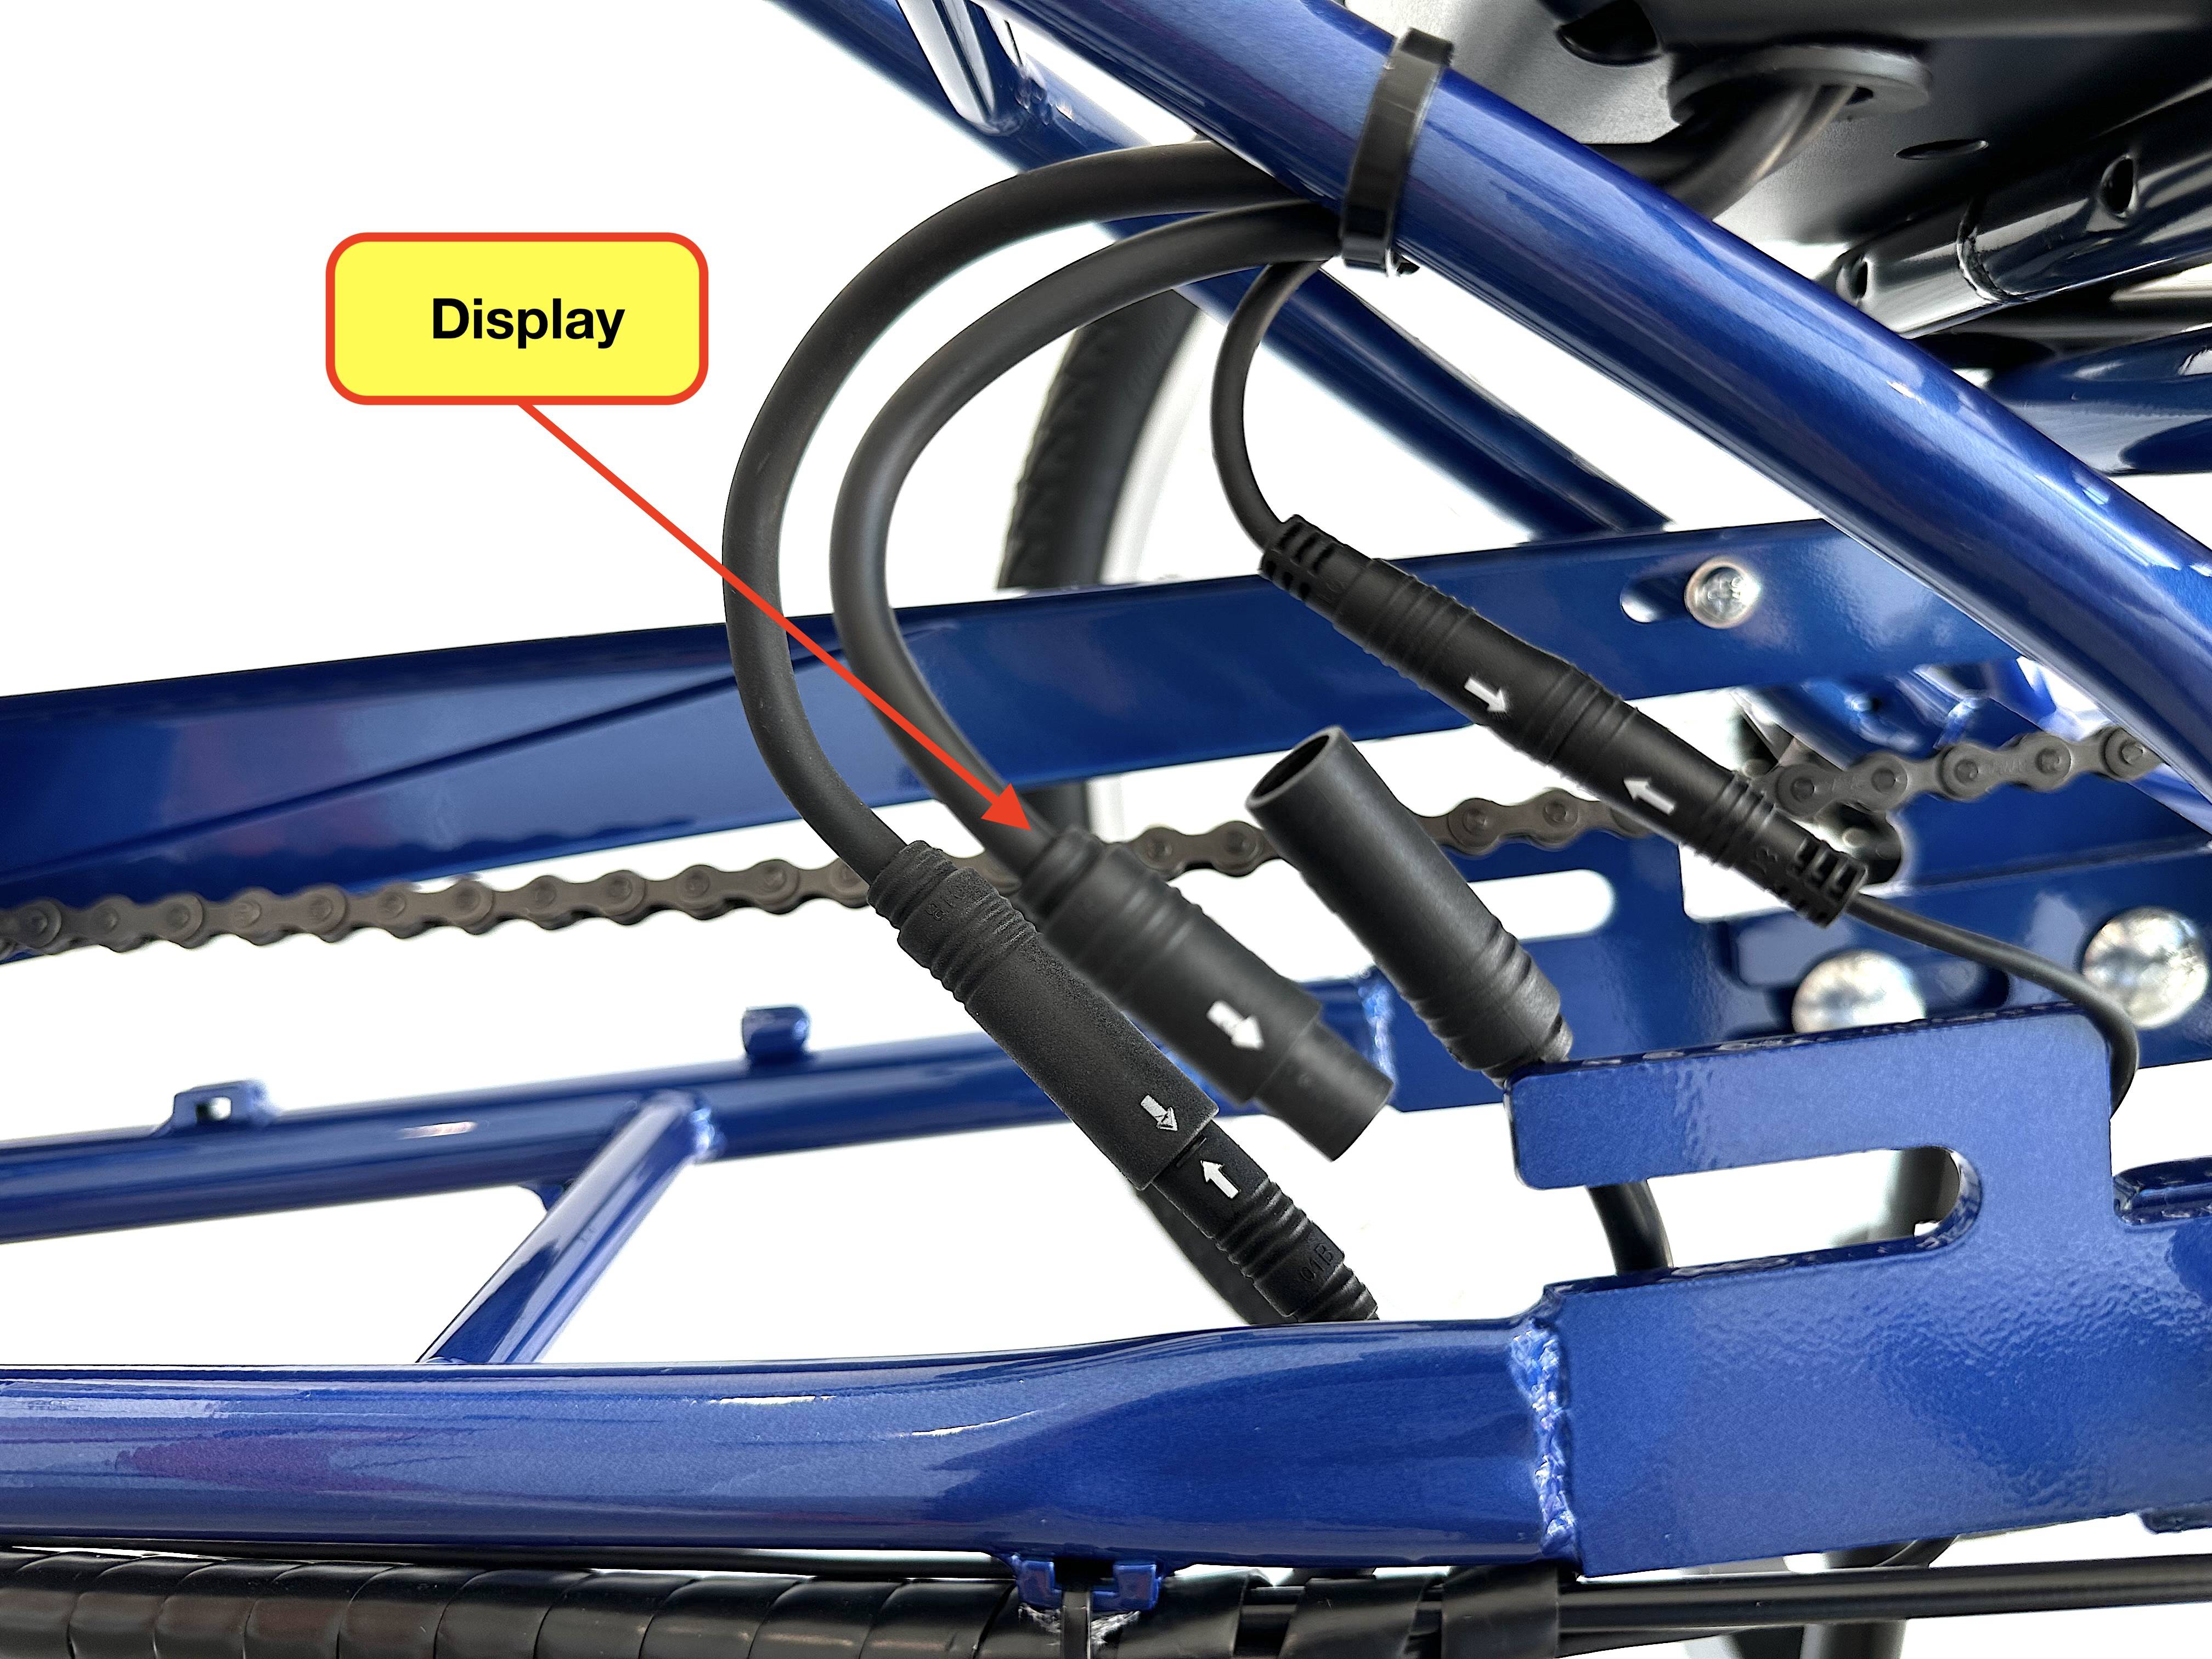
- If the display is still not functional, unplug the quick-connect for the primary wire that runs from the display to the rear of the trike (located near the battery) and inspect the wire and connection pins for signs of damage. If all looks good, then reconnect

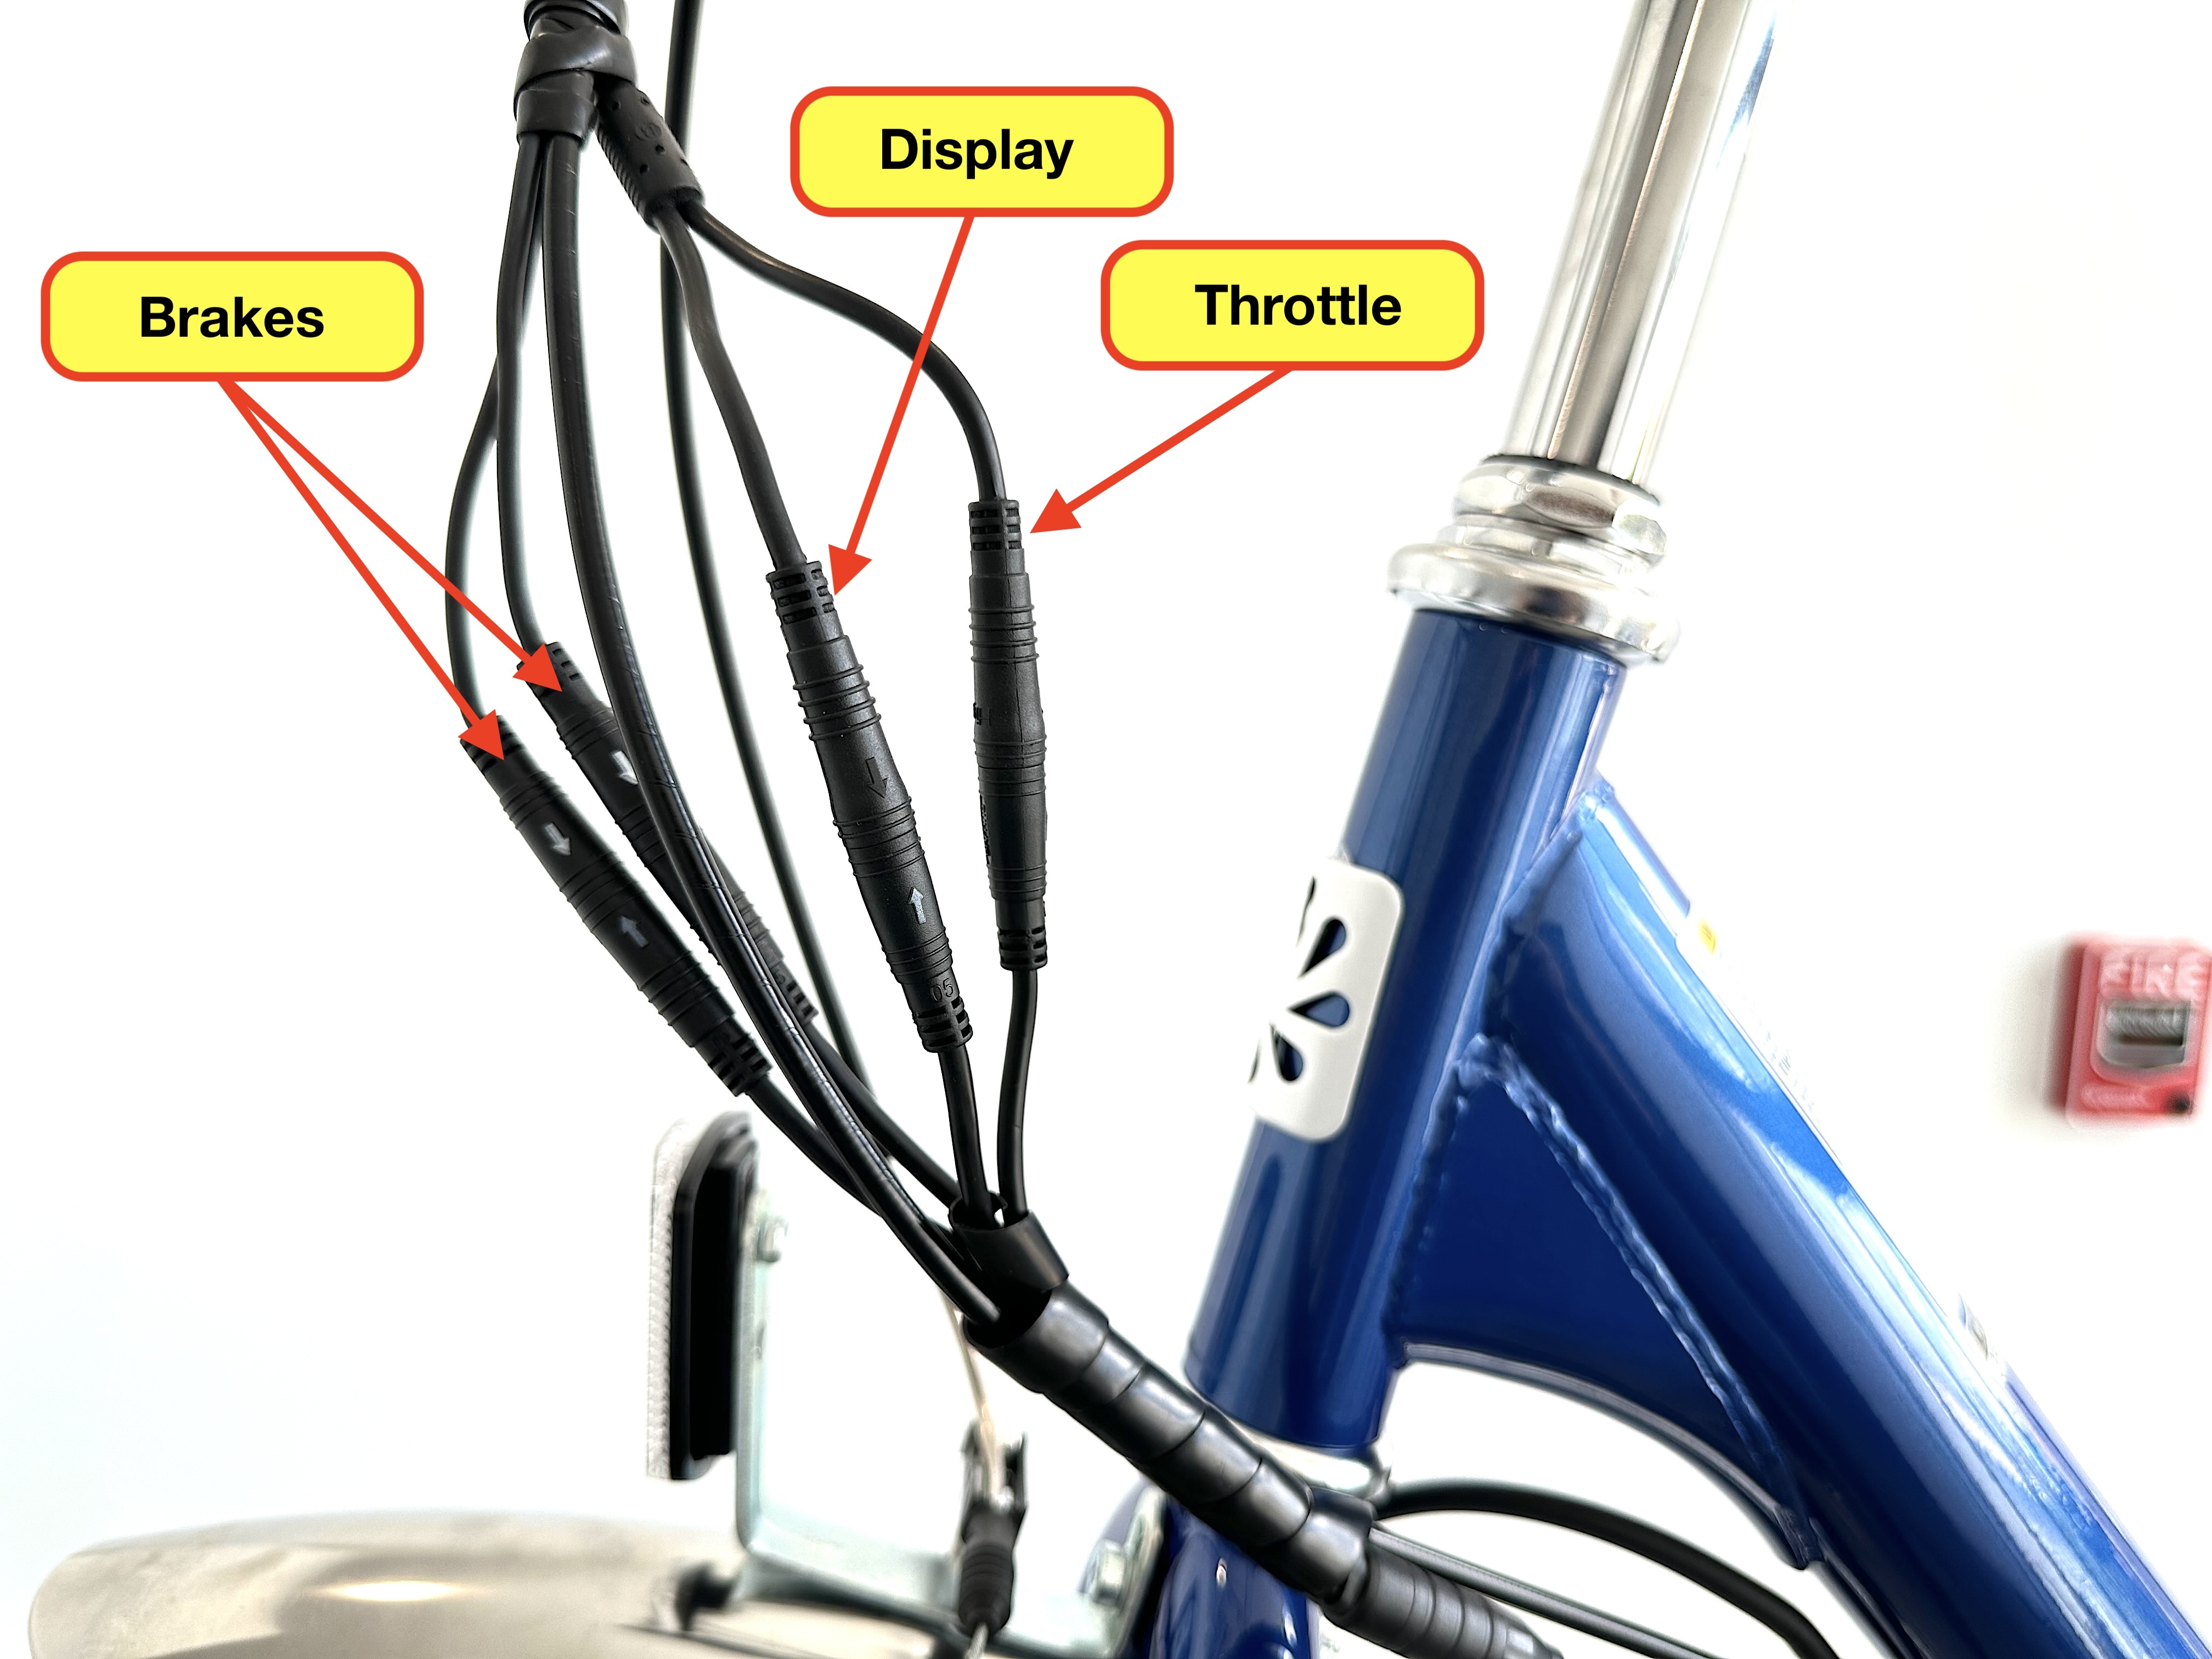
4. IF THE DISPLAY POWERS ON - CHECK FOR ERROR CODES
- For more details, refer to page 30 of the E350 Supplement or consult the complete Bafang hub motor error code list
- If error codes are detected, contact J&B for next steps
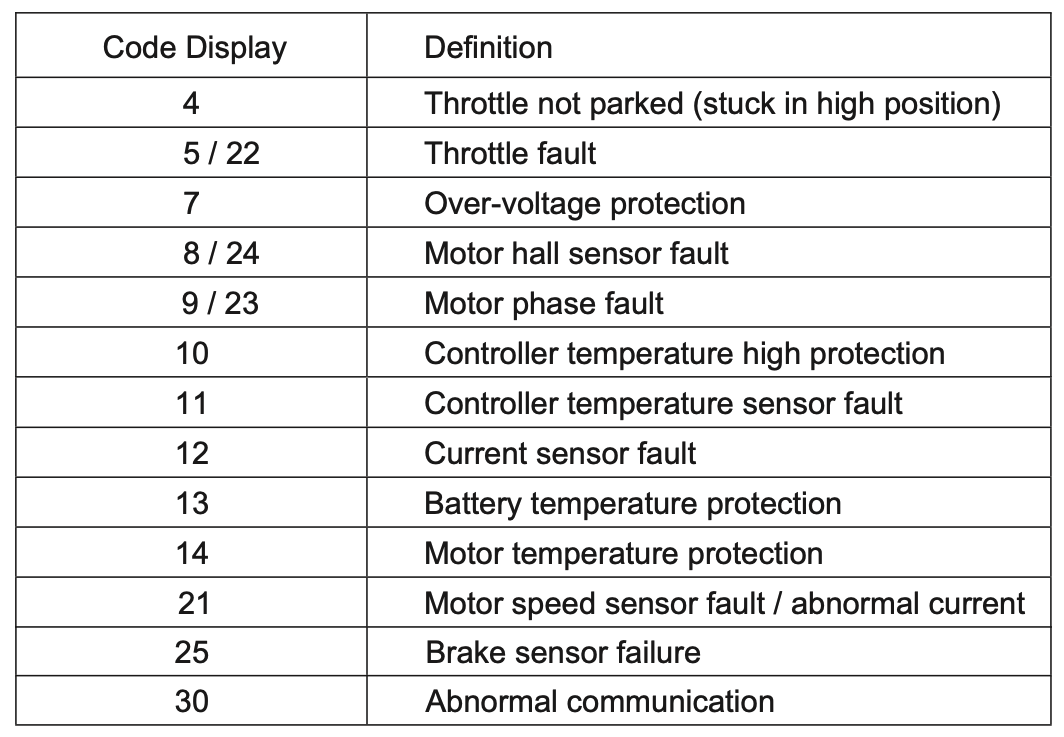
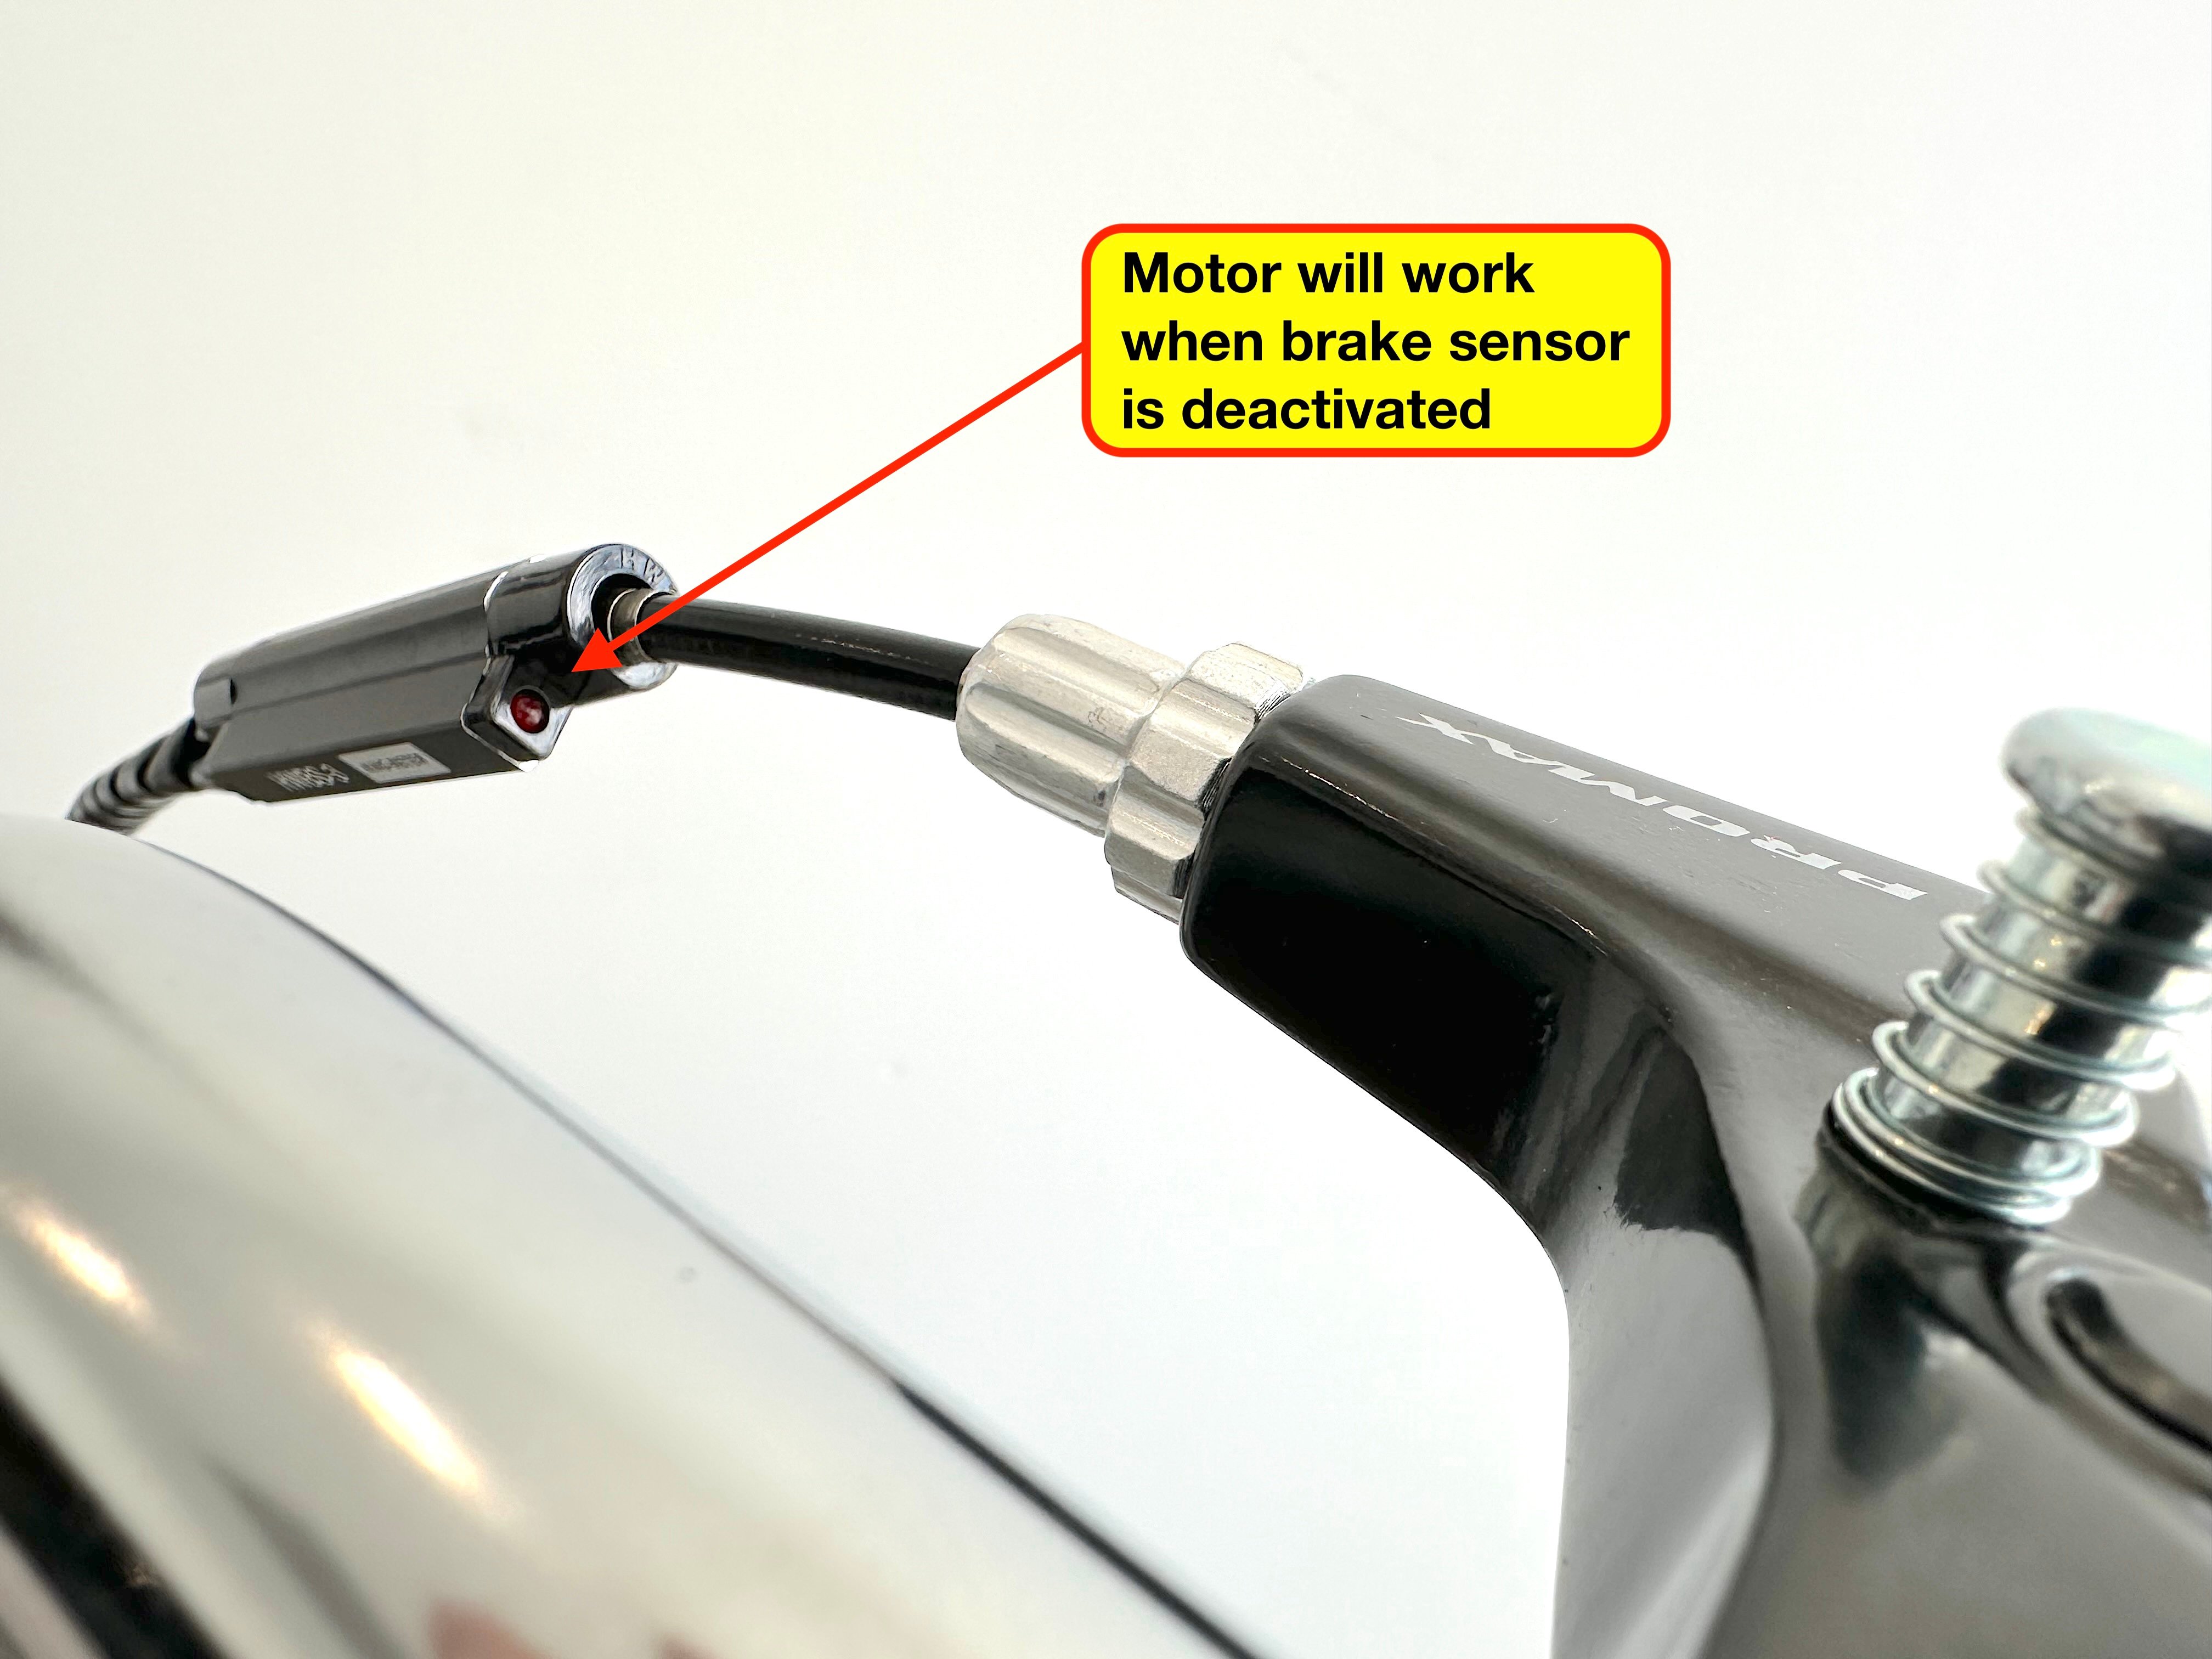
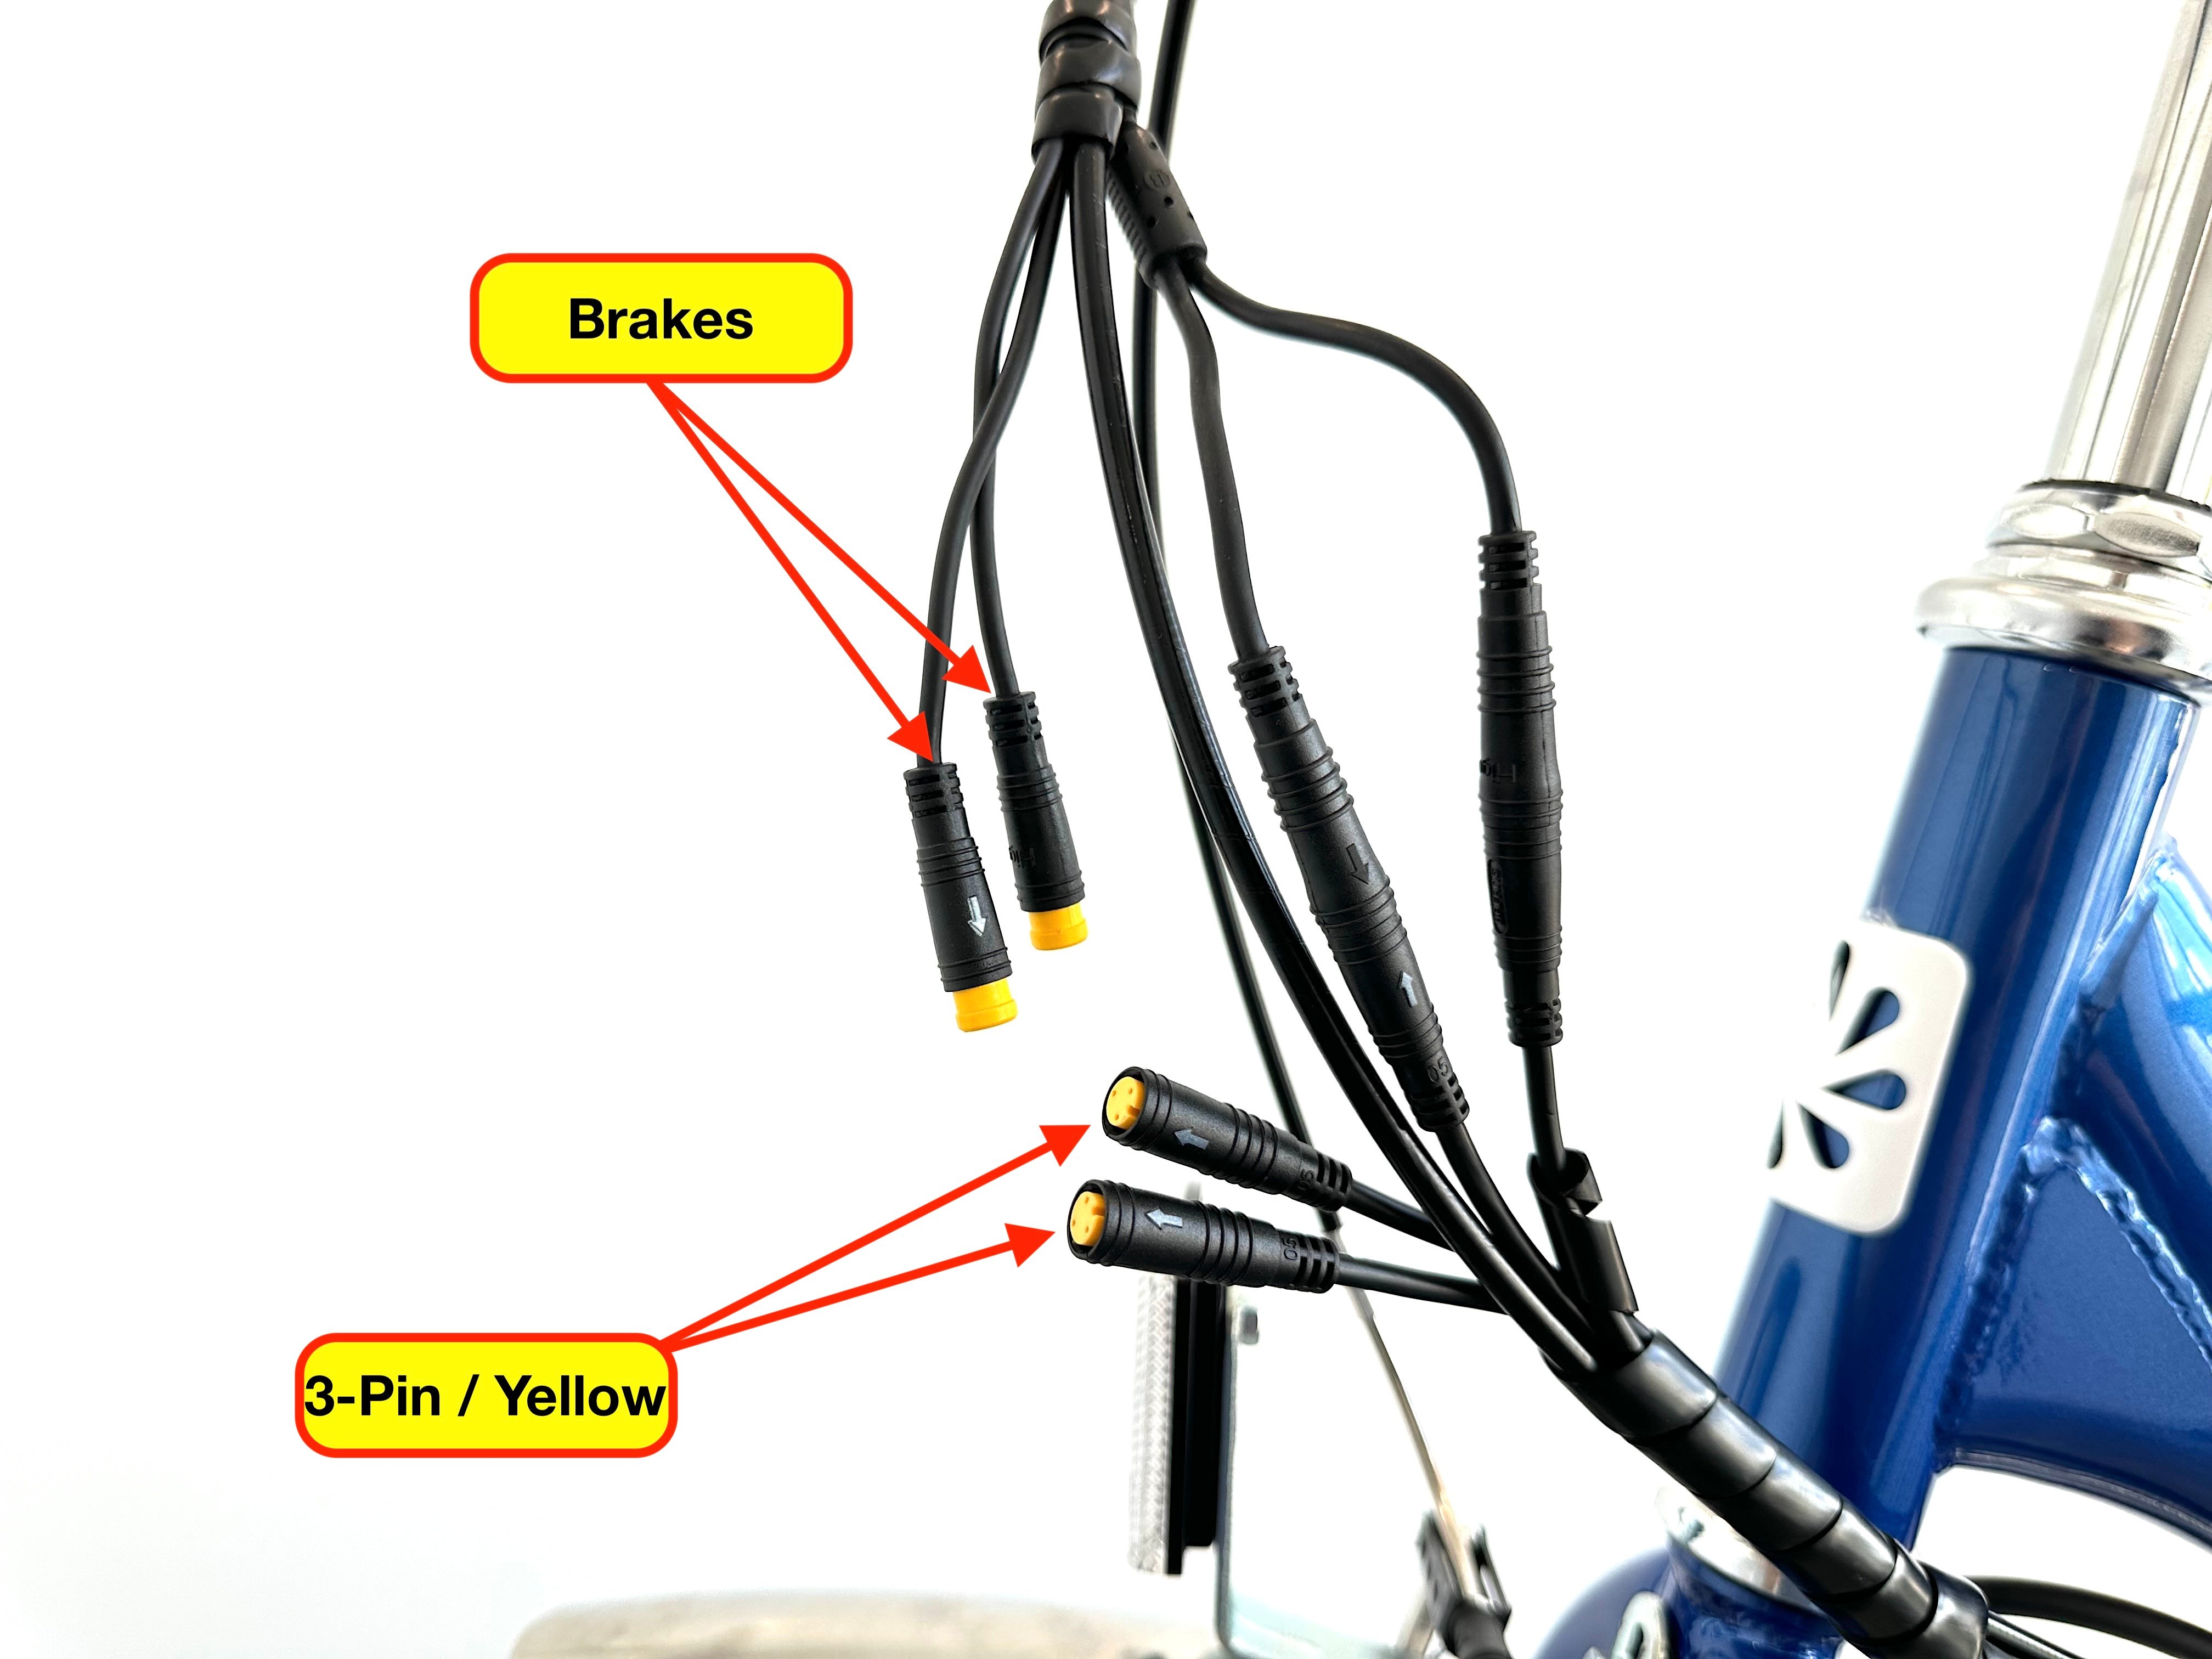
5. CHECK THE BRAKE LEVER(S) SENSOR
- Check the front and rear e-brake levers to ensure they are functioning properly
- When either lever is pulled, a red LED light will illuminate the brake sensor, and when you release the lever, the red light should turn off
- If the brake cable is too tight, it can prevent the proper function of the brake sensor
- By design, the motor will not function when either lever is pulled and the light is on
- To bypass the brake sensors, unplug the quick-connect for each brake sensor, then recheck for motor function
- If the LED does not illuminate when the lever is pulled, disconnect the cable and inspect the wire and connection pins for signs of damage. If all looks good, then reconnect
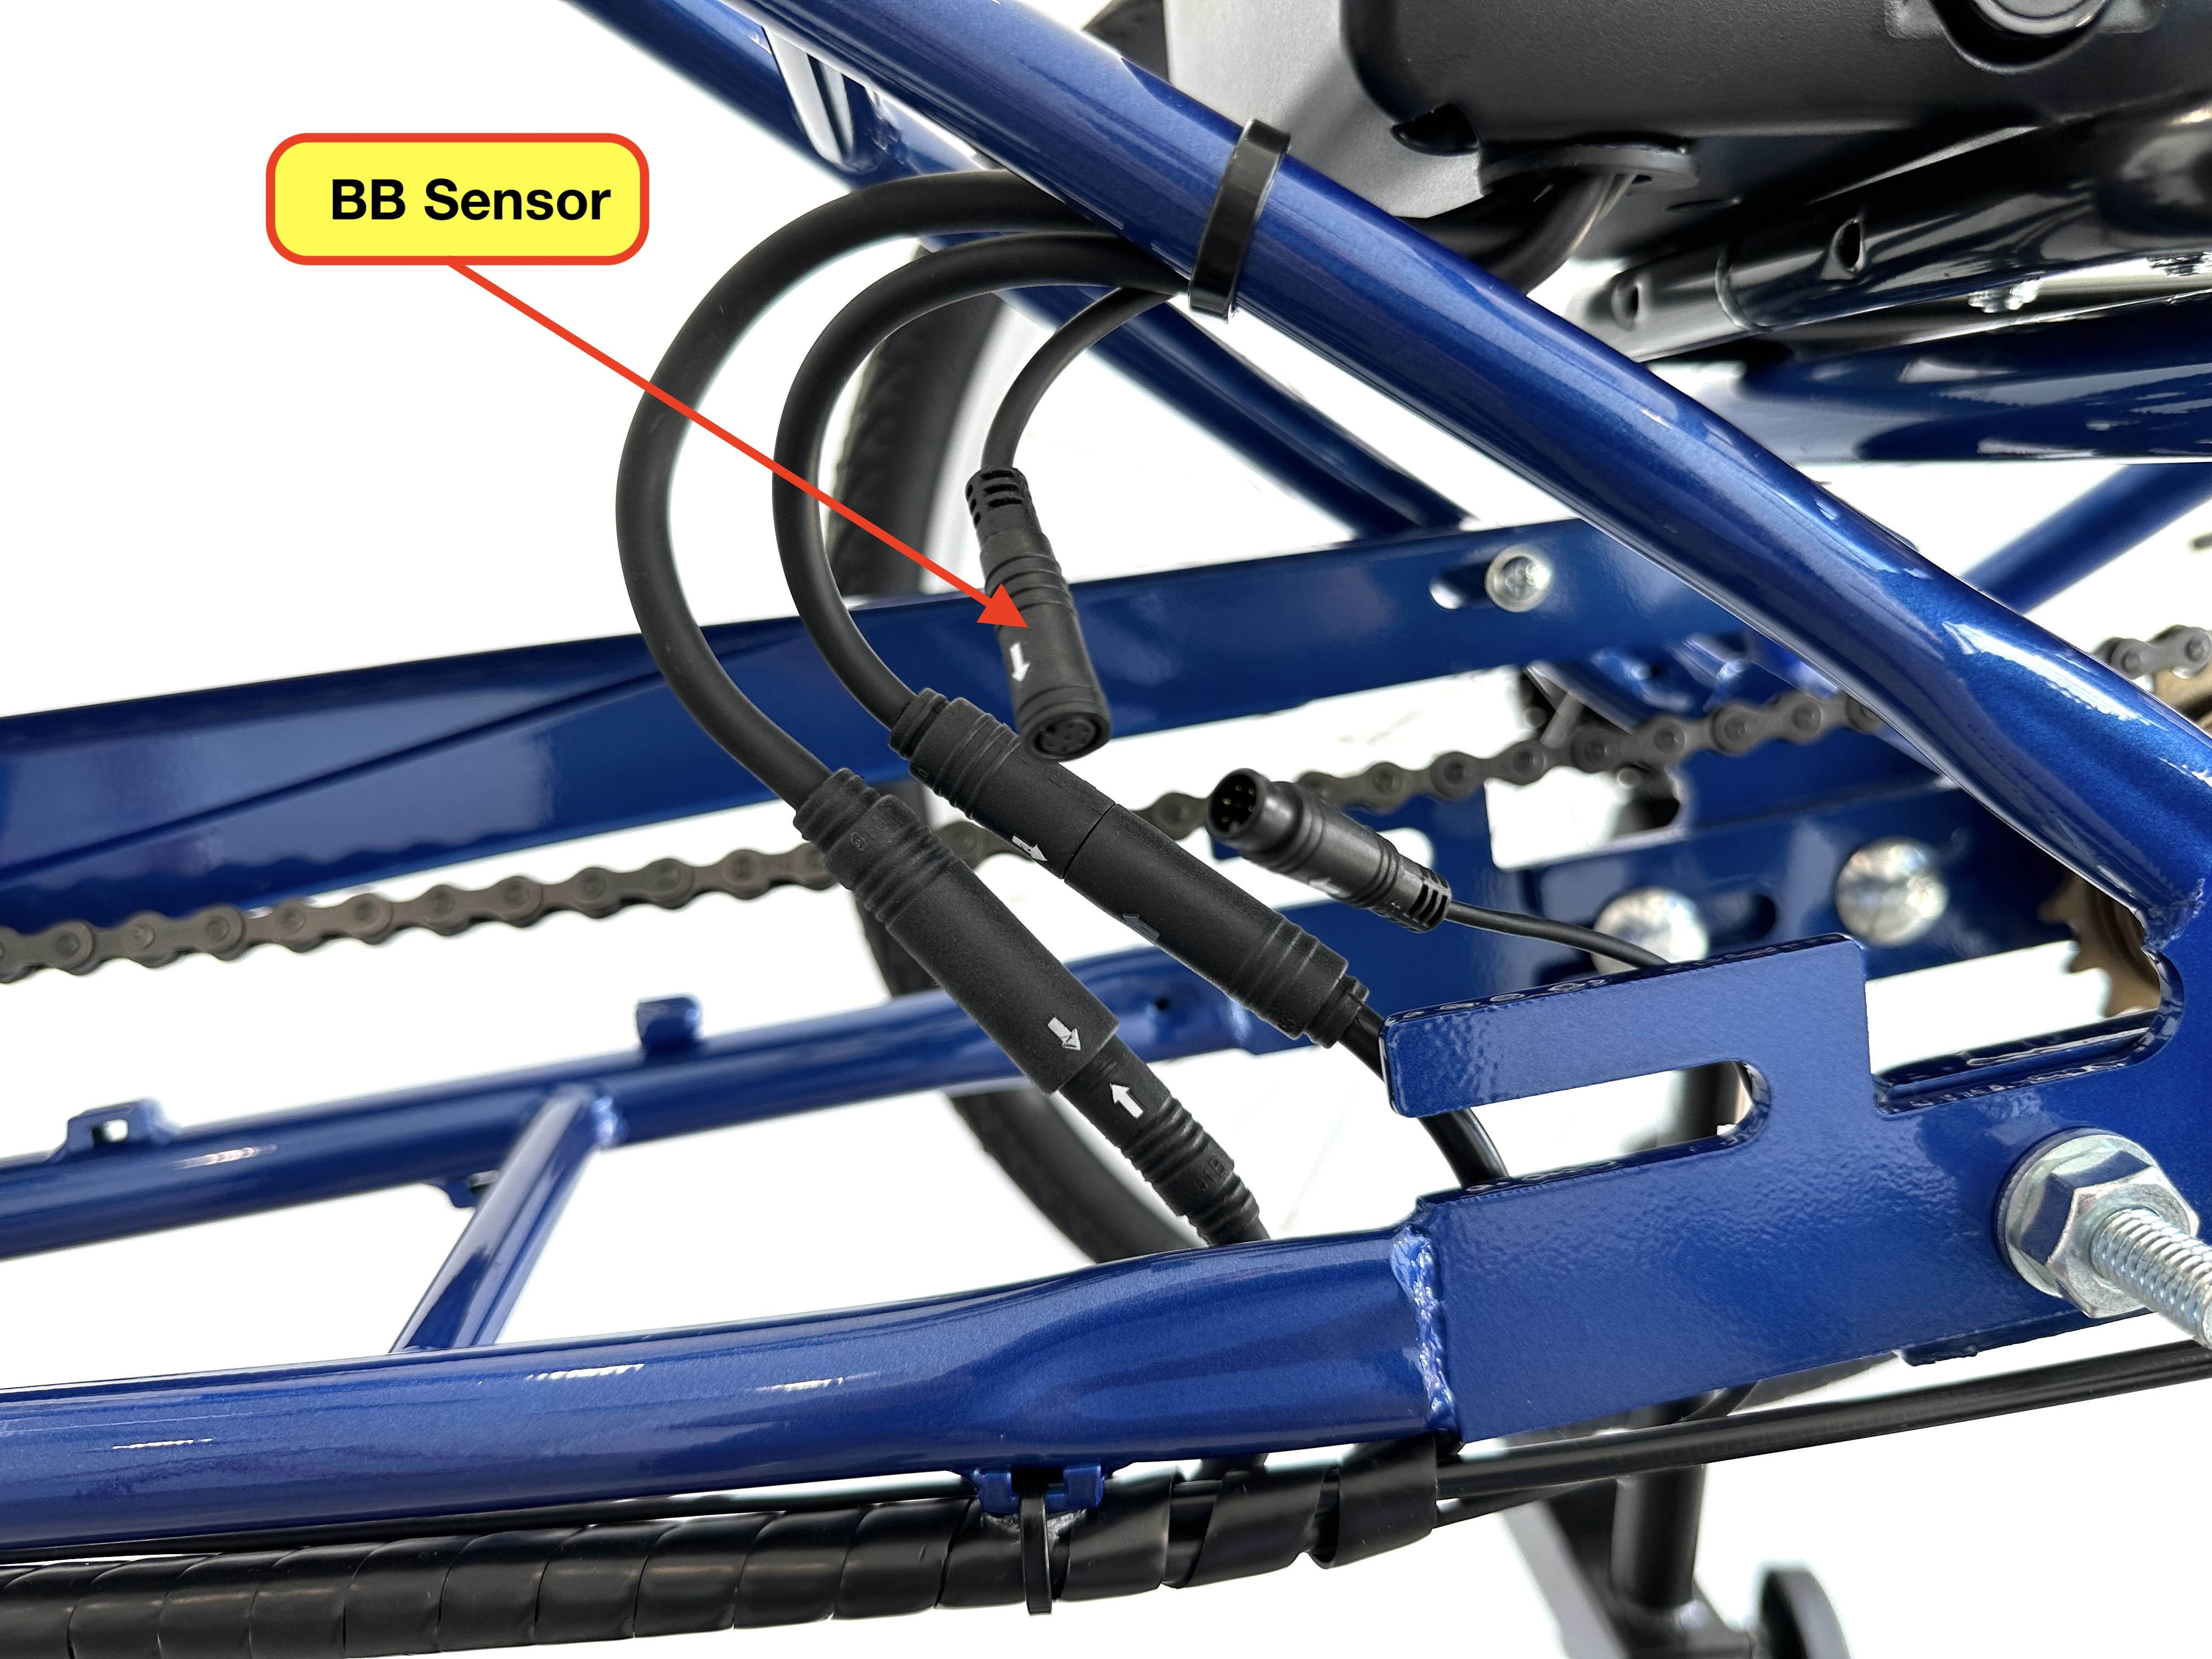
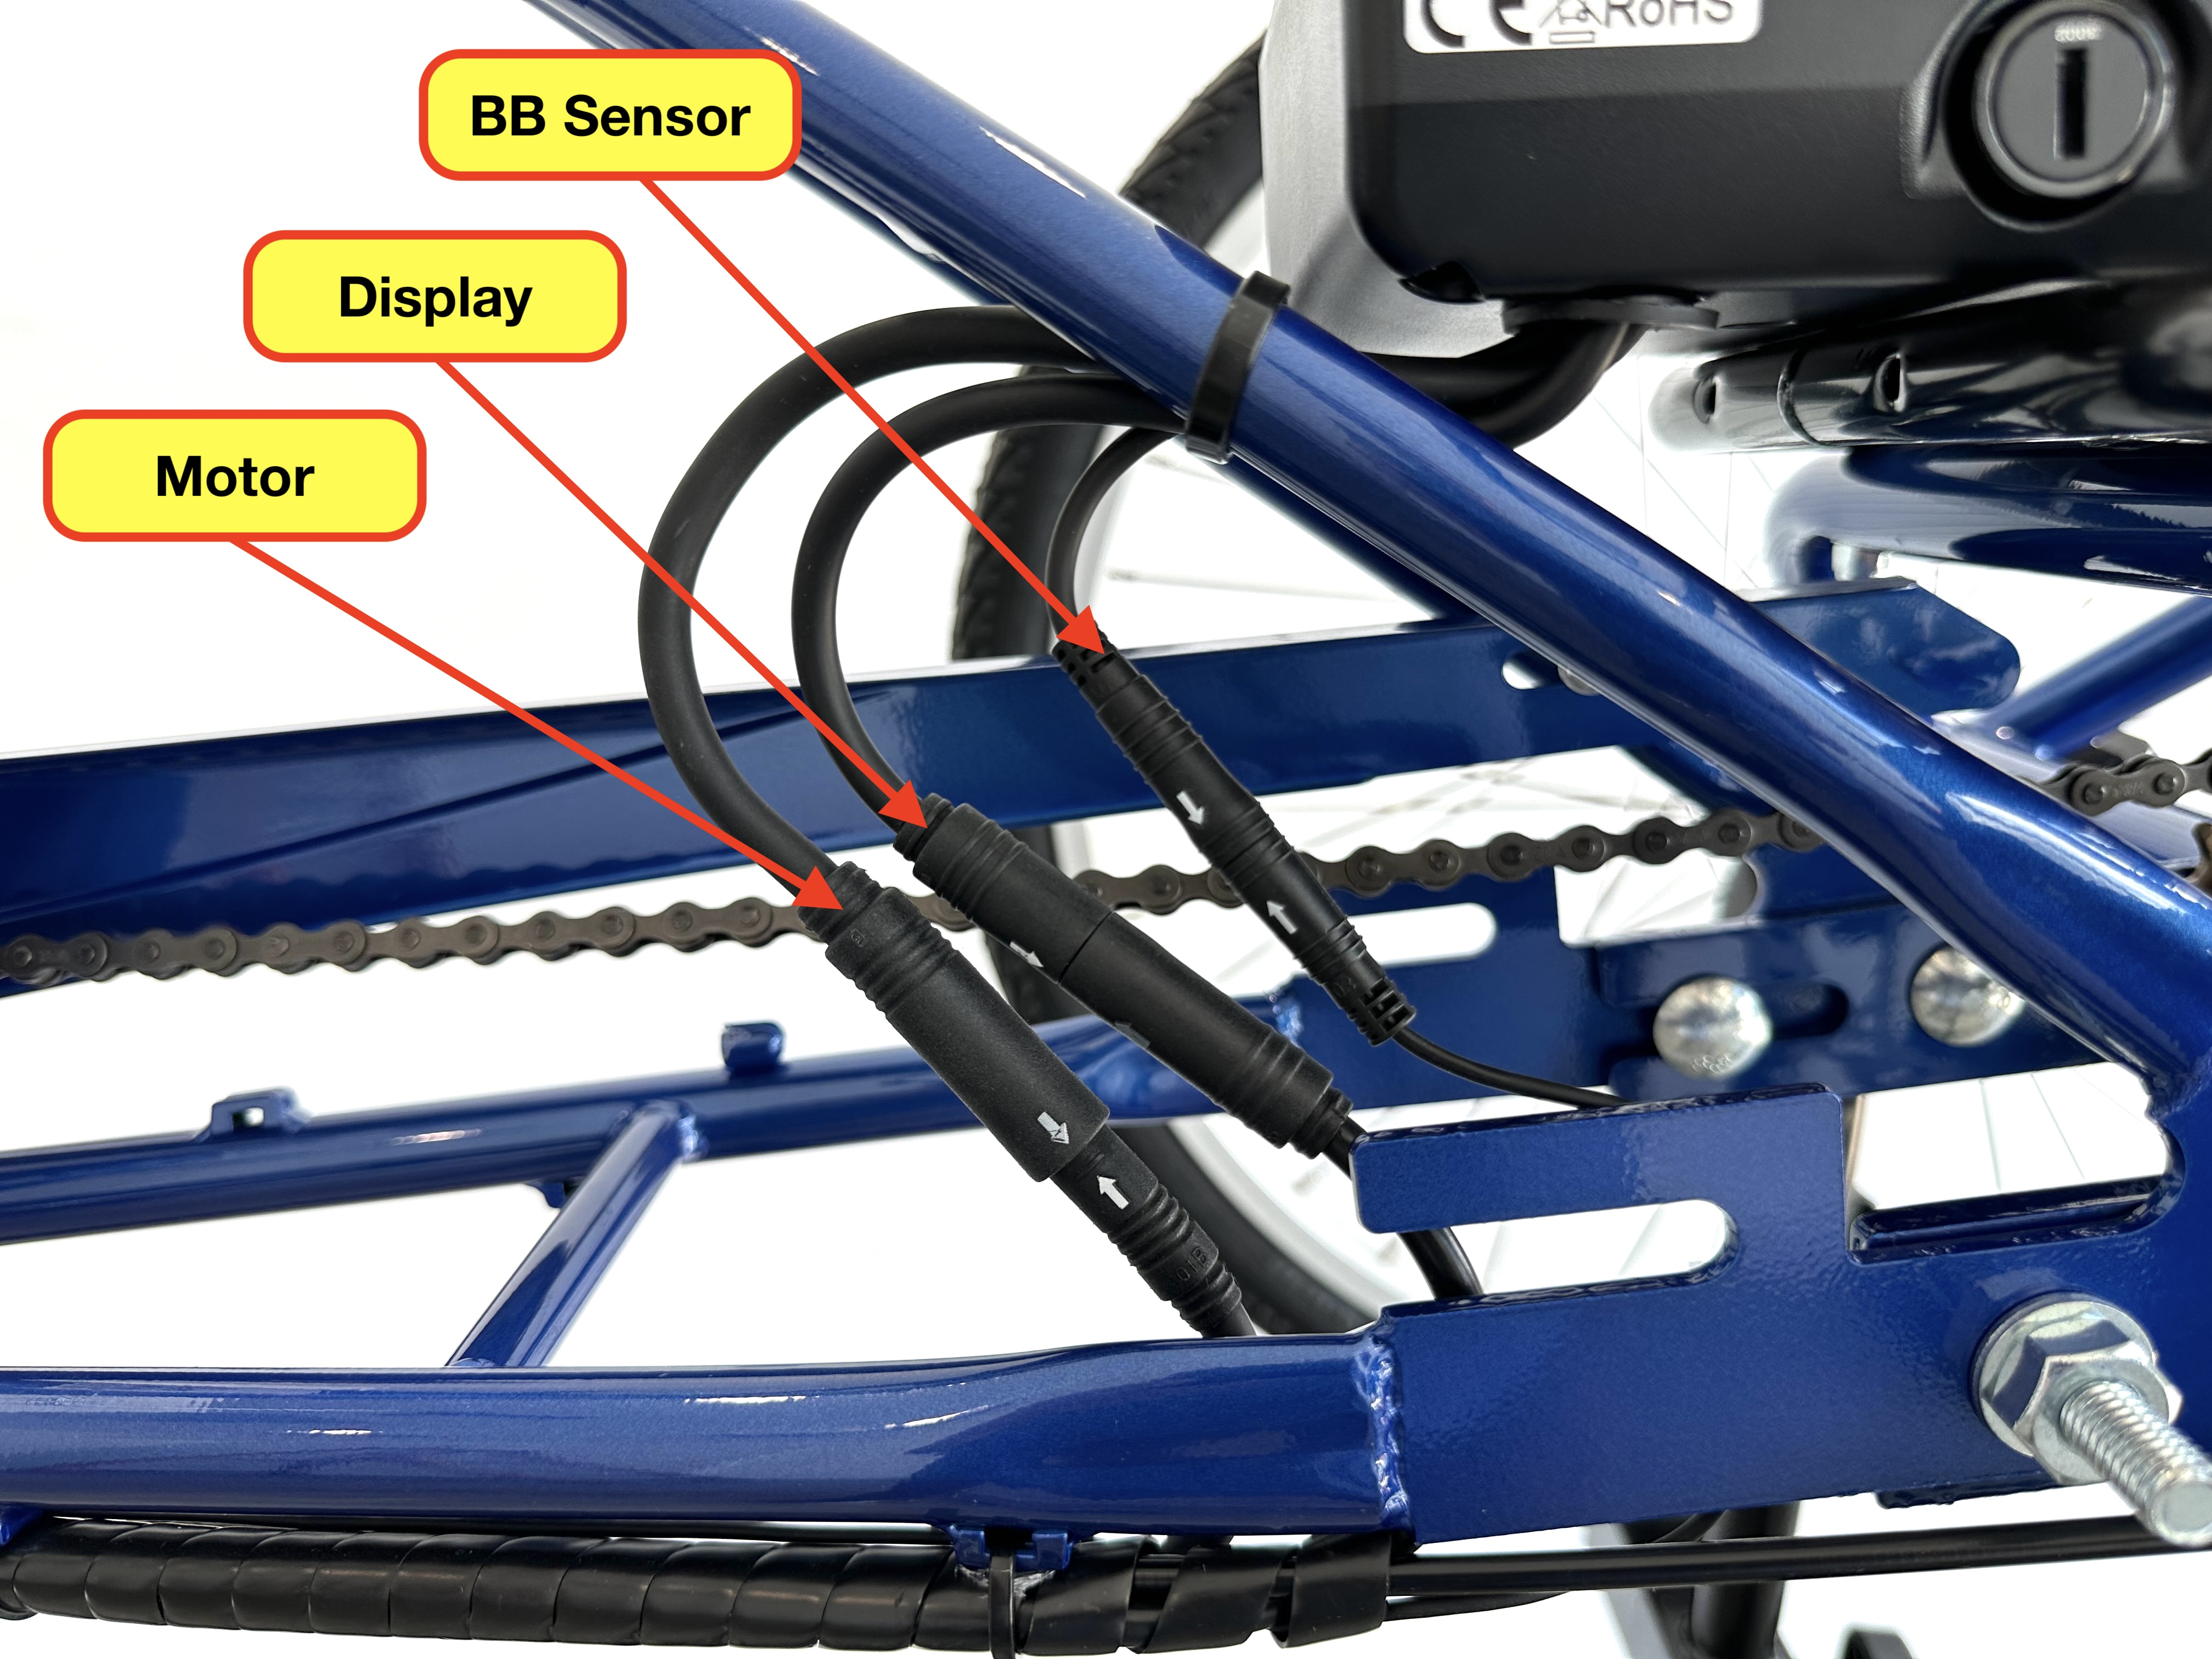
6. CHECK THE BOTTOM BRACKET SENSOR
- Unplug the quick-connect for the BB sensor and inspect the wire and connection pins for signs of damage. If all looks good, then reconnect
- To bypass the BB sensor, unplug the quick-connect and then recheck for motor function using the throttle

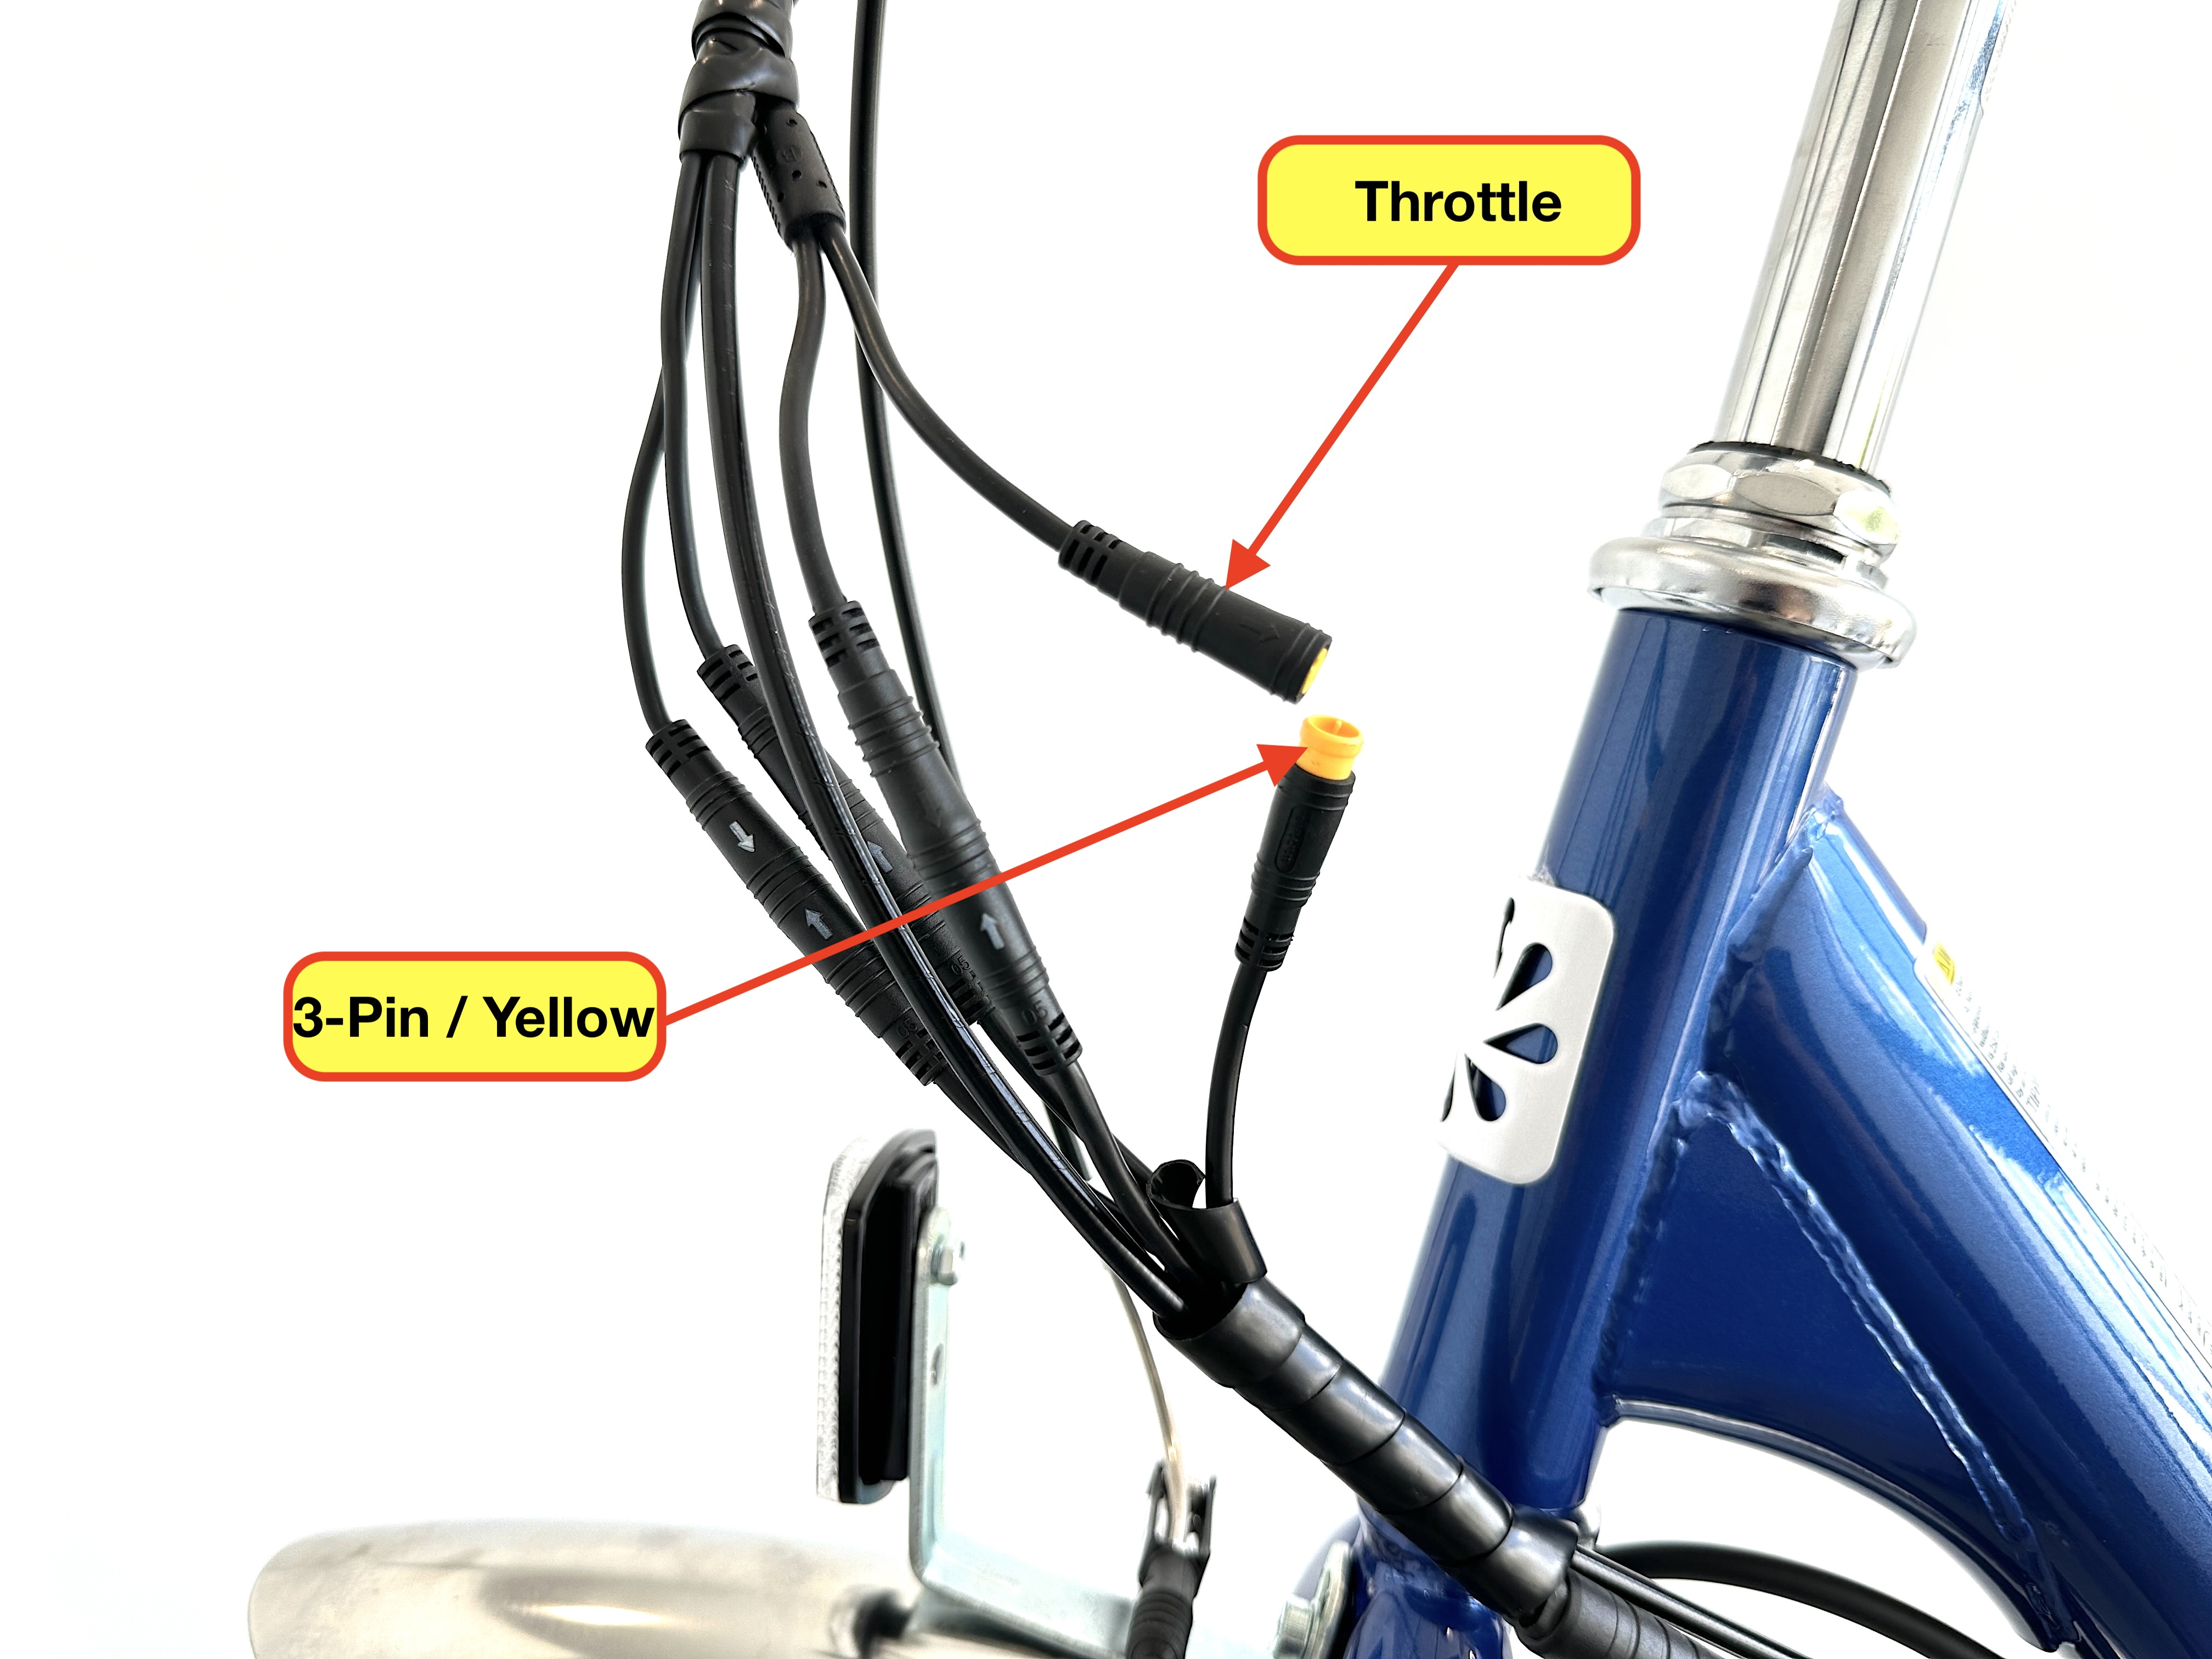
7. CHECK THE THROTTLE
- Unplug the quick-connect for the throttle and inspect the wire and connection pins for signs of damage. If all looks good, then reconnect
- To turn off the throttle, unplug the quick-connect and then recheck for motor function by pedaling

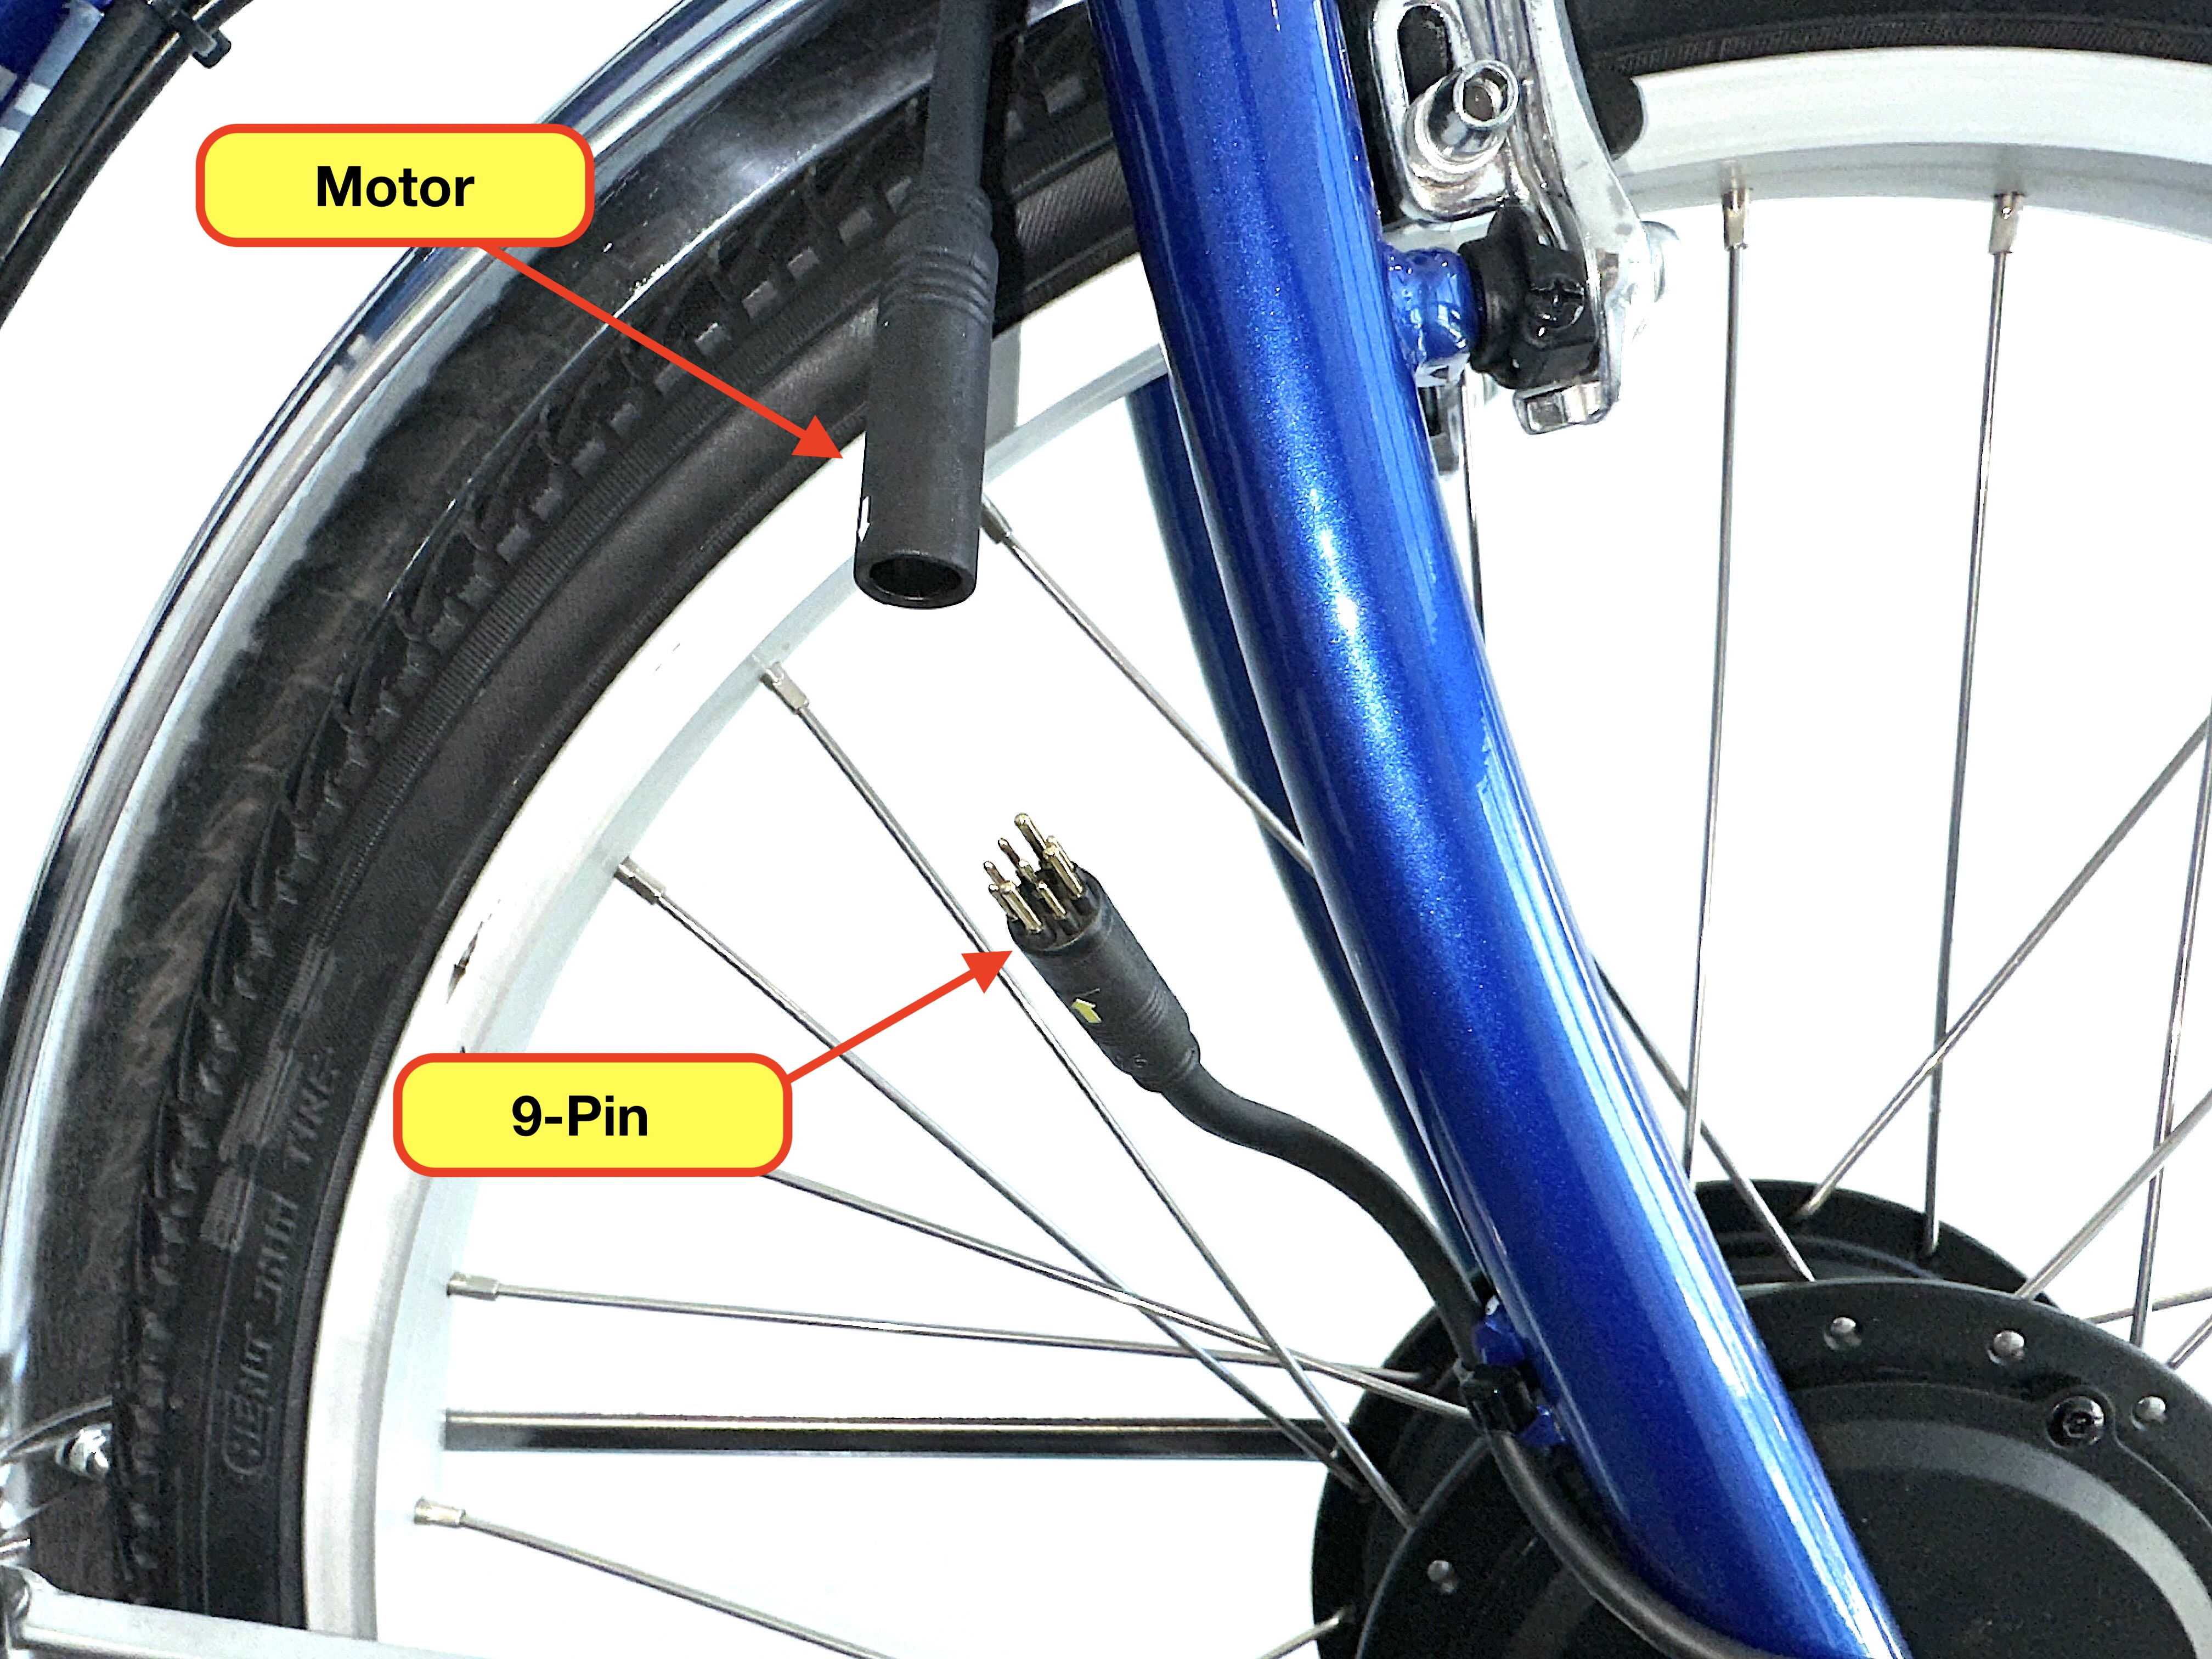
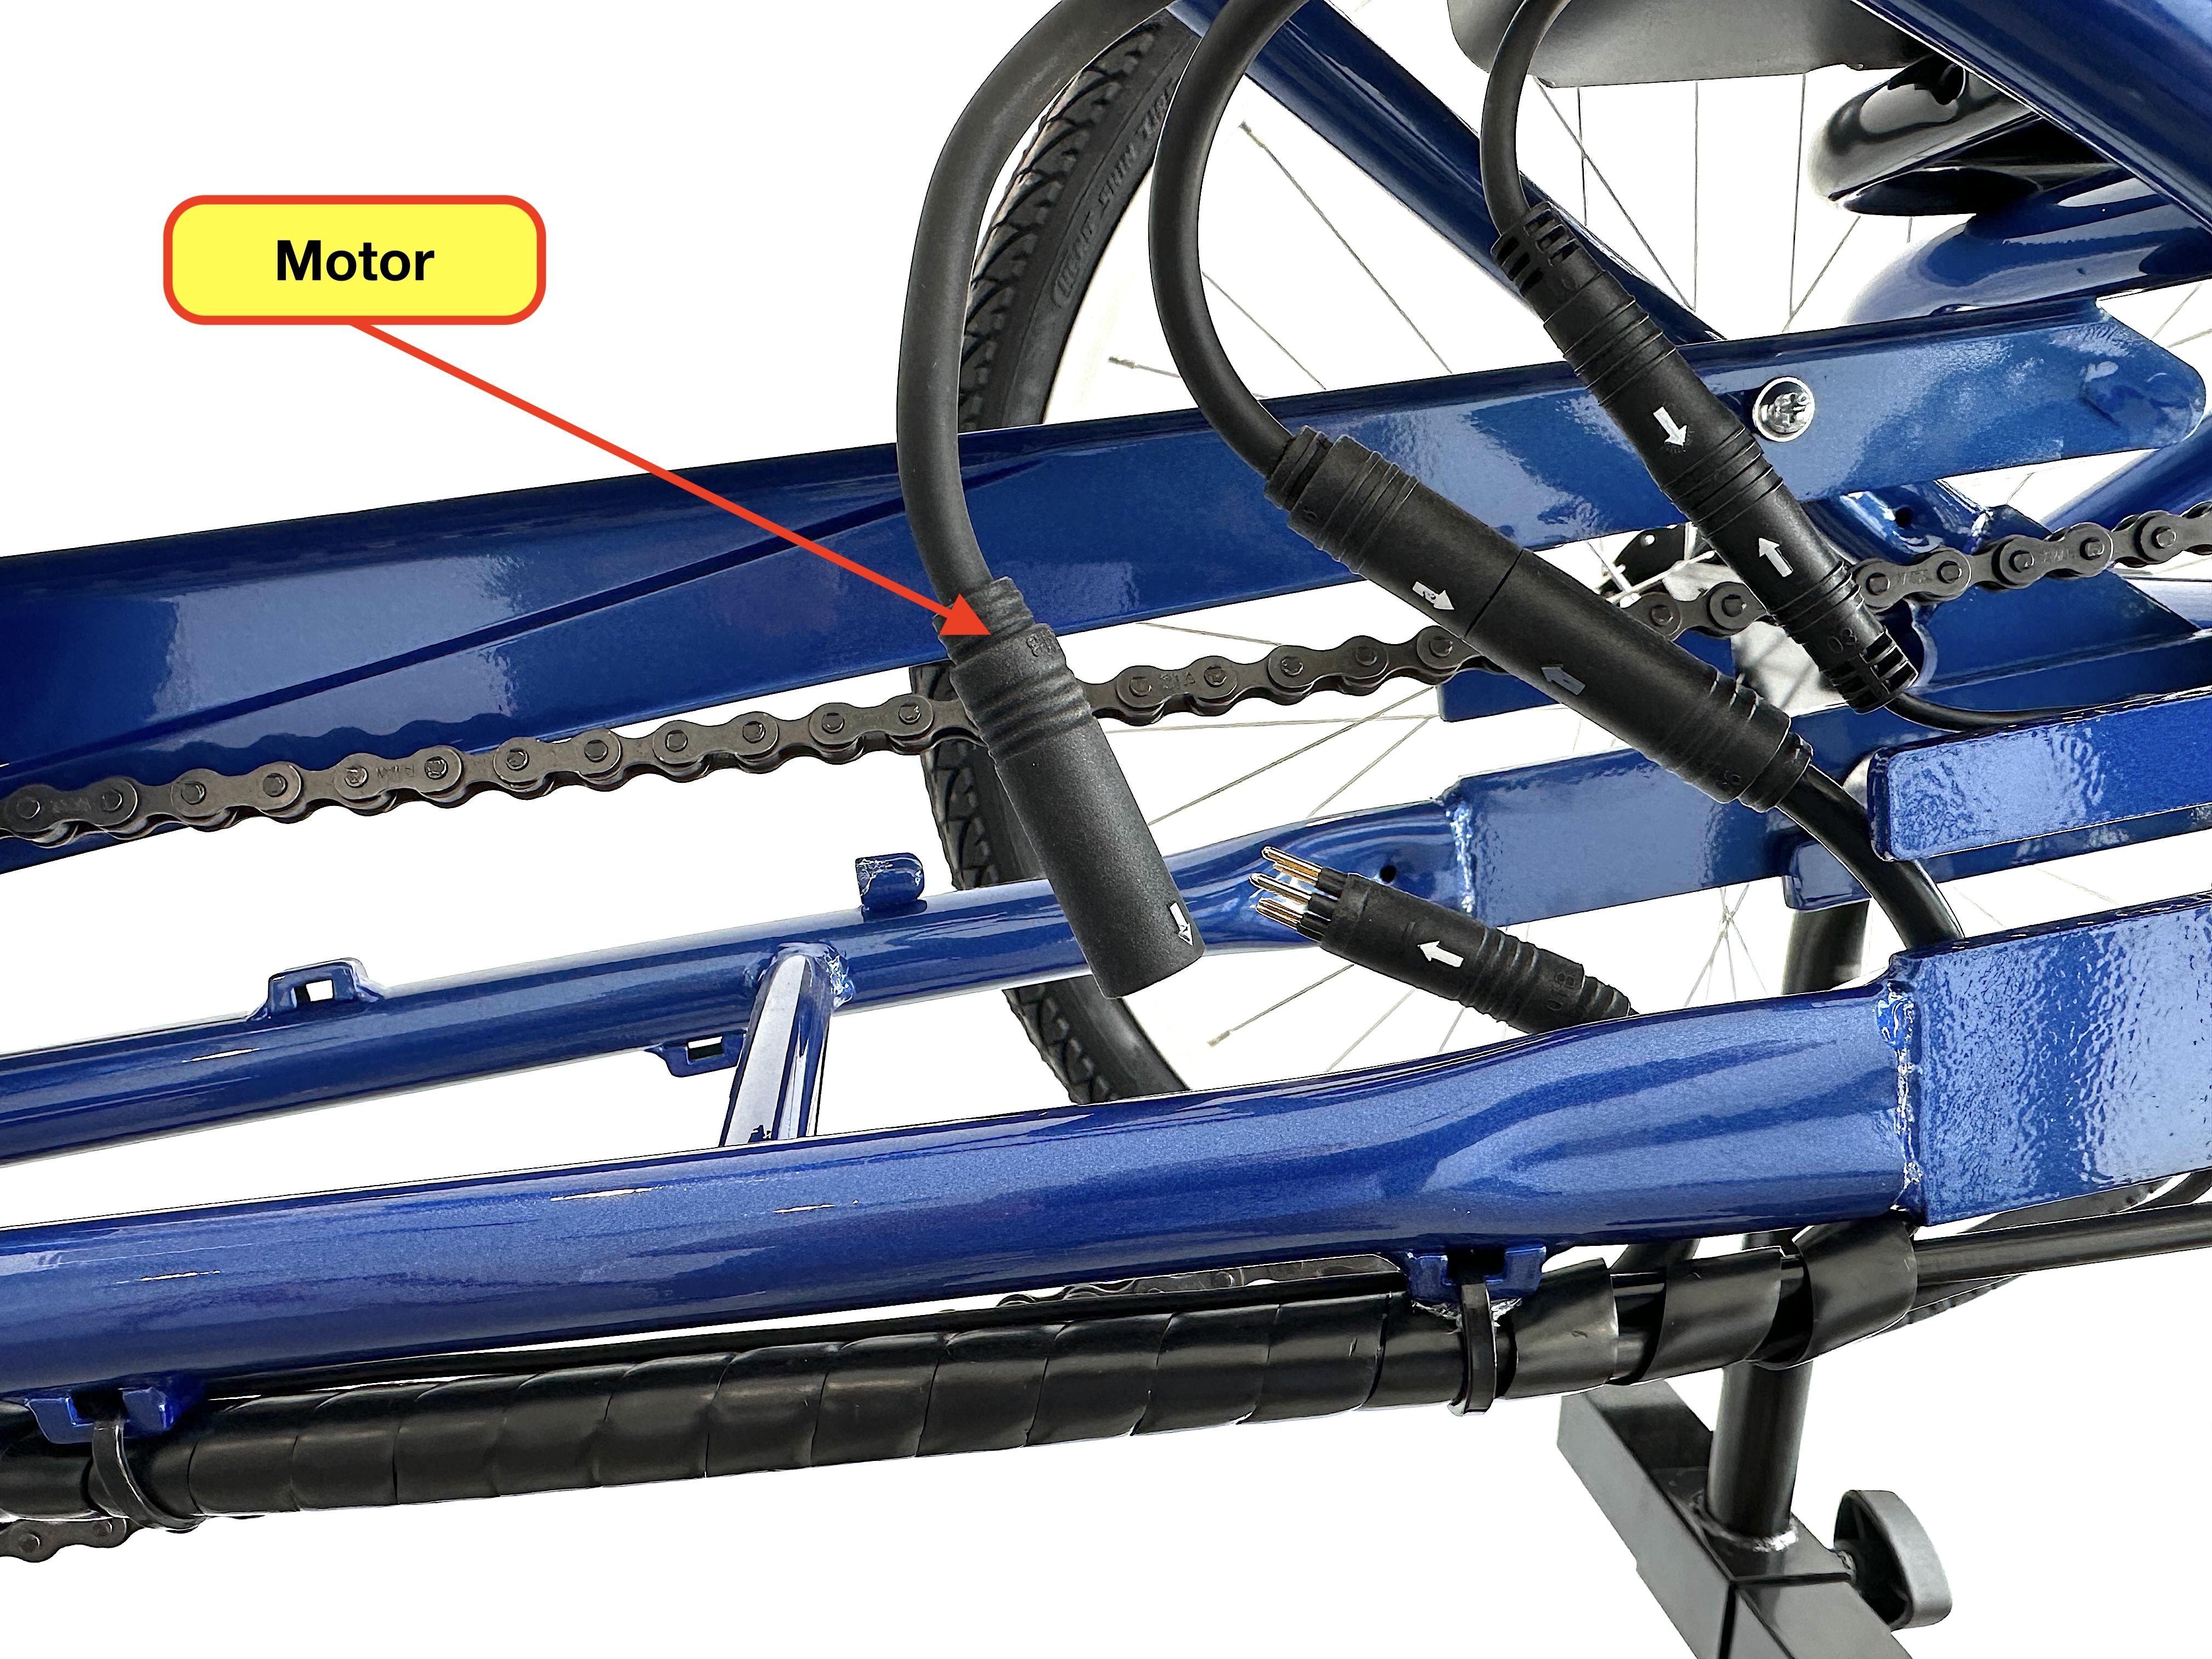
8. CHECK THE MOTOR CONNECTIONS
- Unplug the quick-connect for the motor (located on the right side of the fork blade) and inspect the wire and connection pins for signs of damage. If all looks good, then reconnect
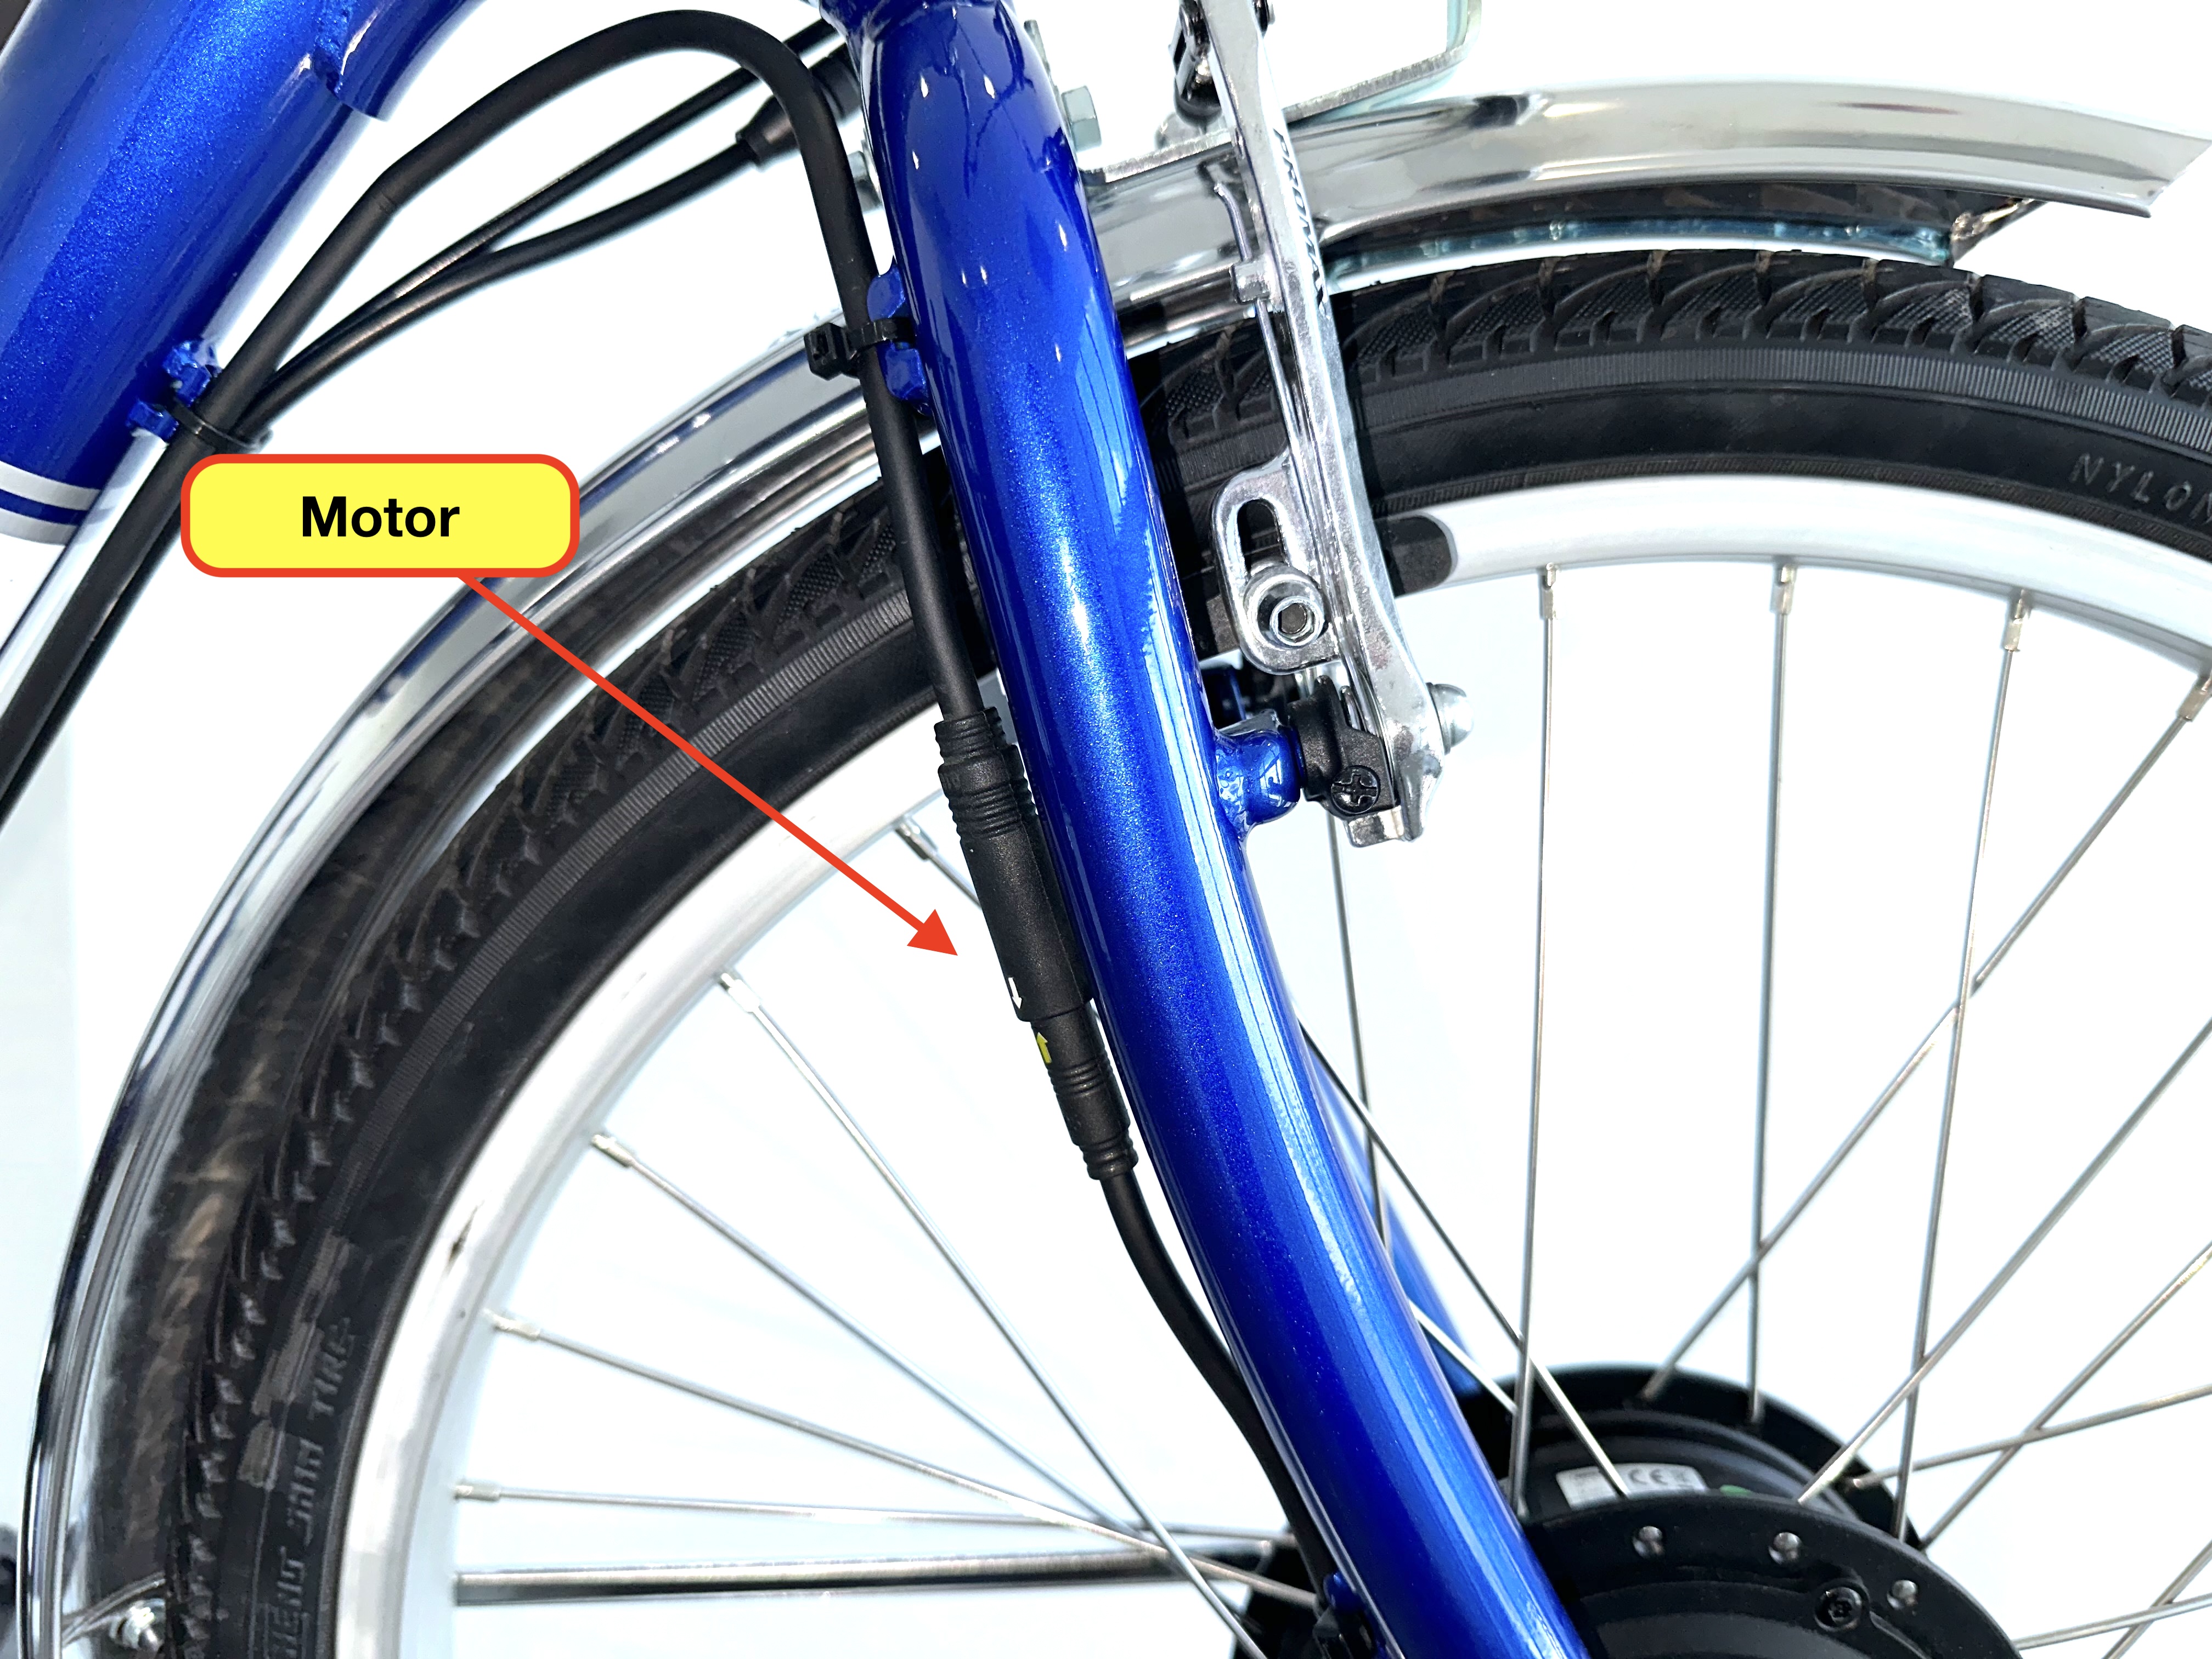
- Unplug the quick-connect for the motor (located near the battery) and inspect the wire and connection pins for signs of damage. If all looks good, then reconnect
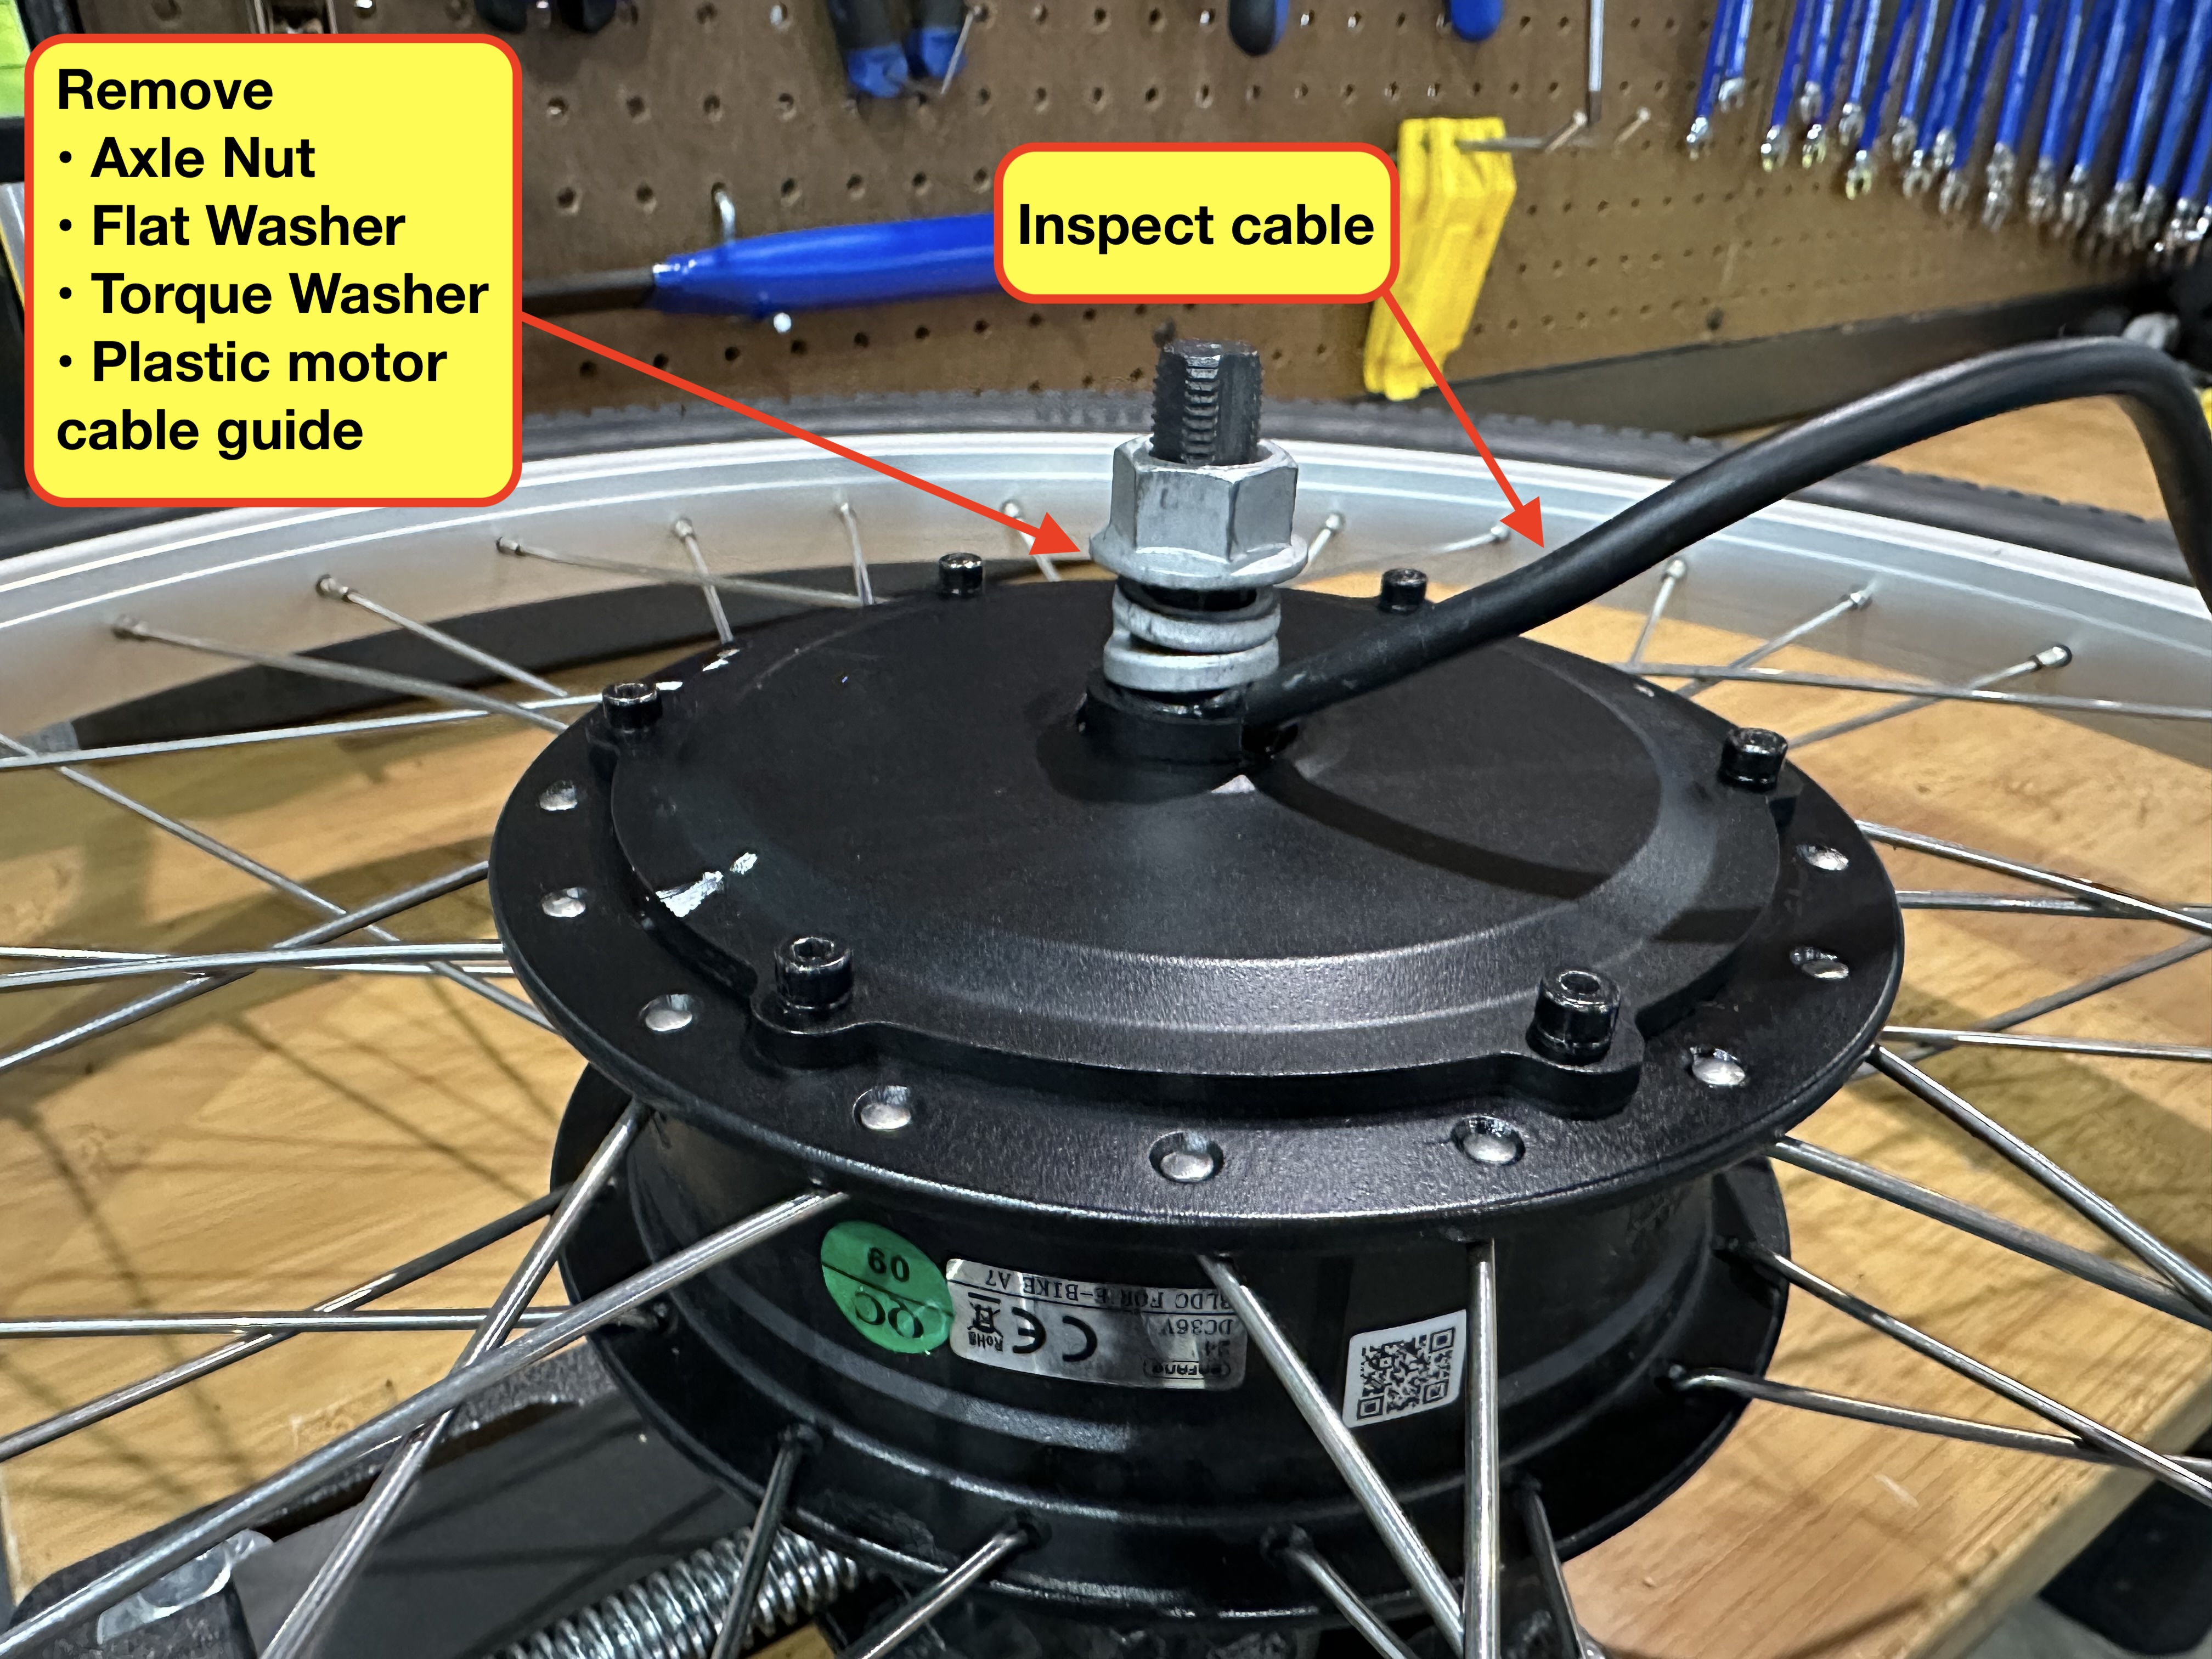
9. CHECK THE MOTOR
- Remove the motor from the trike
- Inspect the motor cable that leads into the axle for signs of damage
- Remove the axle nuts, flat washers, torque washers, and plastic motor cable guide and check for signs of damage to the motor cable.
- During removal, observe if the torque washers and flat washers were installed correctly
- Torque washers should be installed on the inside of the dropout
- Flat washers should be installed on the outside of the dropout
- Remove the plastic motor cable spacer to get a clear view of the cable as it enters the axle
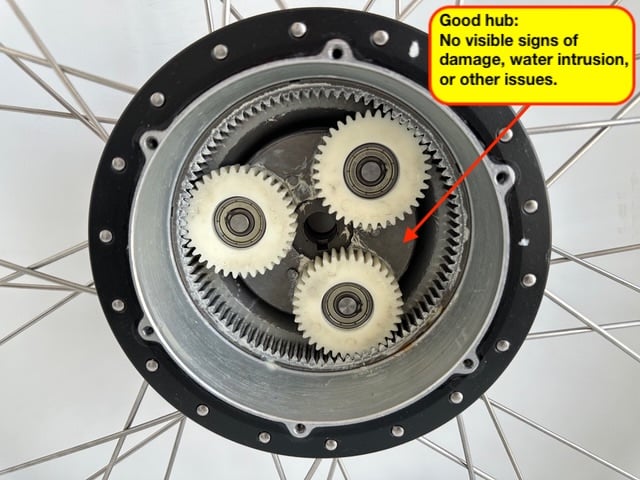
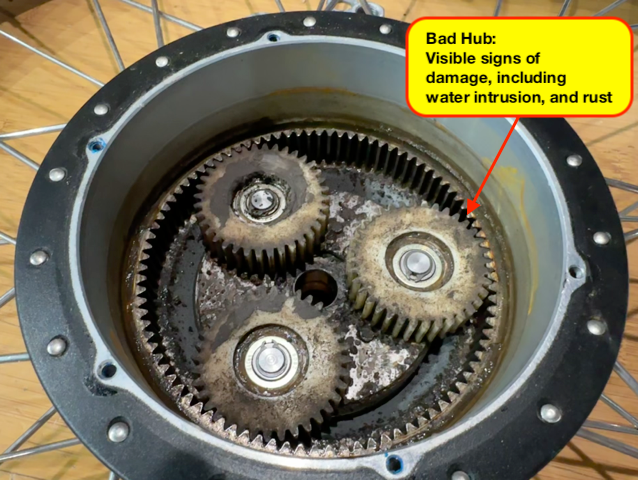
Remove the motor cover and look for signs of water ingress, burning, scorching, melting, or discoloration of the component(s) and surrounding areas.
- Check the planetary gears to ensure they are operating normally and don’t show any signs of damage to the teeth on each gear
10. IF THE E-SYSTEM IS STILL NOT WORKING - CONTACT J&B FOR THE NEXT STEPS
- If the e-system is still not working correctly, the underlying cause likely relates to a fault within the motor, controller, display, battery, or primary wiring harness. To accurately pinpoint the malfunctioning component, it is necessary to replace each part one at a time. This process will help identify the malfunctioning piece, thereby restoring the normal operation of the system
CONCLUSIONS
If the e-system is still under the Sun Bicycles' warranty and shows no signs of abuse, neglect, physical damage, or conditions indicative of a crash or excessive exposure to the elements, it qualifies for consideration under the warranty claim.